Acrylic Pour Swipe Technique in 6 Easy Steps
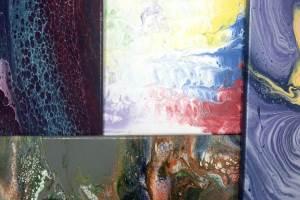
The swipe technique is probably one of the most recognizable acrylic paint pouring techniques. This technique is identified by lacing and cells that are outlined by the color that was swiped. The swipe color frequently is highlighted along one of the sides or through the center of the pour.
The beautiful look created by the swipe technique, also known as the acrylic pour and swipe, can be achieved by following these simple steps: Gather Your Supplies, Mix Your Paint, Pour Your Base, Swipe, Torch, and finally Tilt and Add Paint to Cover.
We’ll be diving into each one of these steps in greater detail below. By following these 6 simple steps you should be well on your way to becoming an acrylic swipe painting master.
Gather Your Supplies (1)
The first thing we need to do when preparing for an acrylic pour swipe is to gather all the materials that we will need. A paint swipe is different compared to many other techniques only in that you need a tool to do your swipe with.
Swipe Pour Materials
- Paint – Review our article on the Best Acrylic Paint for Pouring.
- Pouring Medium – Glue-All or Floetrol for beginners.
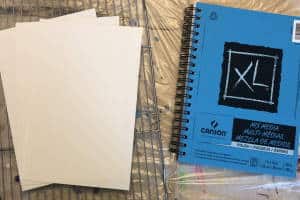
- Painting Surface – Canvas or wood board
- Mixing Cup
- Mixing Sticks
- Distilled Water
- Something to catch drips – This can be plastic sheeting, a silicone mat, a disposable cooking tray or multiple other items.
- Scale – for those of you like me that want to make sure our proportions are correct
- Swipe Tool – For beginners, we recommend a wet paper towel. See section Swipe (4) for other options.
- Silicone or Dimethicone (optional)
Mix Your Paint (2)
This step is arguably the most important step when doing any type of acrylic paint pour. The consistency of your paint can make or break your swipe pour painting.
For a swipe, we want the paint consistency of the swipe color to be slightly thinner than a base acrylic pour. This ensures that the swipe paint can easily glide across the base paint without getting too caught up in each other.
If the paints are too thick, the swipe just pulls the base paint with it instead of creating a very thin layer of paint across the swipe surface areas. There are some artists that use thicker paints for a paint swipe, but they take more than a little practice to master so we’ll be sticking with a more common consistency.
Two Acrylic Pour Mix Recipes
Here are two of the acrylic pour recipes that we use for our swipe pour paintings.
Floetrol – Mix 2 parts floetrol to one part paint.
Elmer’s Glue-All – Create your pouring medium with 60% Elmer’s Glue-All to 40% water. Once that is done, use one part paint to two parts pouring medium.
For thick paints like heavy body acrylics, you may need to add a little more water. For craft paints and soft body acrylics, they will be close to the right consistency already but may need a drop or two more water.
Small Mound and Disappear Consistency
To measure consistency, we are using our mixing stick and pulling a good glob of paint out of the paint cup and dripping it back into the cup from about one inch away from the rest of the paint.
This consistency we are looking for is for the paint to drip onto the surface of the paint, create a small mound, and then immediately disappear. We generally use a double-wide popsicle stick.
A small popsicle stick would create a very small mound and disappear. A spoon or other stir utensil will not create much of a mound at all because more paint comes off at a time.
Swipe Color Should Be Higher Weight/Density
For a beginner, we recommend you use a titanium white as your swipe color. This color has a higher weight/density compared to other paints. See our Acrylic Paint Density Chart to determine your paint’s density.
When you swipe a higher density of paint over the top of a lower density paint, it is going to try and sink into the “lighter” paint. This is the key to creating cells and lacing that we see in an acrylic swipe painting.
Some other colors that seem to have a higher paint density than other colors that could also be used as a swipe color are the cerulean blues, yellow and red oxides, mars black, and cadmium colors.
Get a more details explanation on why paint weight/density matters when creating cells and lacing in our article Acrylic Pour Cells: Everything You Need to Know.
Add Silicone for Cells
Most artists use pure silicone or dimethicone to help facilitate the creation of lacing and cells in their acrylic pours.
Silicone should only be used in the base colors and not in the swipe color. The idea is that the silicone either sits on the surface of the base coast or is coaxed up through the base coat and breaks through the swipe color on top letting the base colors show through.
Our recommendation for beginners is to use 1 drop of silicone per 2 ounces of paint. In a 4 oz cup of paint, you would use 2 drops of silicone. A little silicone goes a LONG way and too much will ruin your painting.
If you do not use silicone or dimethicone in your swipe base colors, you will most likely get a ton of very small cells. The swipe color will also stay on top of the other colors in your places making it look more like a wash over the top of your painting.
Pour Your Base (3)
There are many ways to pour the base of your acrylic pour swipe. Almost any other acrylic pour technique can be used.
Our two favorite techniques are the traditional pour and a basic dirty pour.
The straight pour we choose to do most is just rows of different color paints all along the painting surface. This is a great base because once the swipe is done you can see the bands of each distinct color under your swipe color.
A dirty pour can be done as a flip cup or a straight pour and gives a little more depth to the design underneath your pour.
Cover the Painting Surface
One thing you do need to do at this stage is to make sure you’re whole painting surface is covered after you are done with the pouring the base coat.
When you do a fluid acrylic swipe technique, you will find that sometimes you don’t want to tilt anything off the painting surface after you are finished. The swipe comes out exactly how you want it.
Because of this, you want to make sure that every part of the surface is covered before you even start the swipe, including the sides of the surface. Those are the places most artists miss on a swipe pour.
Remove Excess Paint
As with coverage, you want when you finish with your base coat you want to make sure that you don’t have too much paint on that canvas.
Swipes usually have lots of cells and lacing and those get distorted when they are manipulated too much with tilting.
If we make sure we have tilted off most of the weight of the paint before we move on the swiping step you can avoid the need for any more major tilting.
Where Will You Swipe From?
The last thing we need to take into account is where we plan on doing our swipe from?
For beginners, we recommend choosing one of the short sites of your painting surface. By choosing the smaller side we will be able to swipe all the way across the surface in one long swipe.
More advanced practitioners can decide to swipe from any side, from a line in the middle of the surface, or out from the center to create a starburst effect.
Swipe (4)
As was just mentioned, the swipe can be done from a myriad of different places on the painting surface.
To begin, we want to pour a small line of our swipe color paint along the line that we want to begin our swipe. This does not need to be a huge about of paint as we are only going to be pulling a very thin layer of paint over the rest of the canvas of painting surface.
We have found great success by keeping our swipe line of paint between ½” and 1” wide. This way we don’t have too much of the swipe color left after the pour as it will end up being a solid line of the swipe color which isn’t always desired.
Paper Towel Swipe
Now it’s time to do your swipe.
The easiest swiping tool we have found is a damp paper towel. To use a paper towel, grab a sheet that will cover the entire length of the painting surface. If your surface is too long on the swipe side, use the long edge of more than one paper towel.
Now either wet the edge you have chosen with a water bottle or a hand sprayer. Don’t worry about wetting the whole thing. We want the end that you hold to remain dry as it is stronger and less likely to rip that way.
Ring out any excess water so the paper tower is not dripping. Dripping water in your paint will cause the paint to run and will most likely ruin your pour.
Swipe with a Light Touch
Now lay the wet end of your paper towel along the line of swipe paint that you have laid down. Only allow the wet end of the paper towel to sit in the paint and make sure that the paint touches the paper towel along all the length of the painting surface.
Now with a very gentle touch pull the paper towel along the rest of the canvas. Keep the side of the paper towel you are holding well above the surface of the paint.
This keeps it from touching the paint and it keeps an upward pull that helps the side touching the paint from sinking down into the base coast and pulling too much paint with the swipe paint.
You want the paper towel to glide along the surface of your pour and to deposit a very small layer of swipe paint along the top.
Don’t worry if your swipe paint doesn’t fully cover. You will be coaxing out your cells with the torch later or you can swipe again to get better coverage or change the pattern of the results.
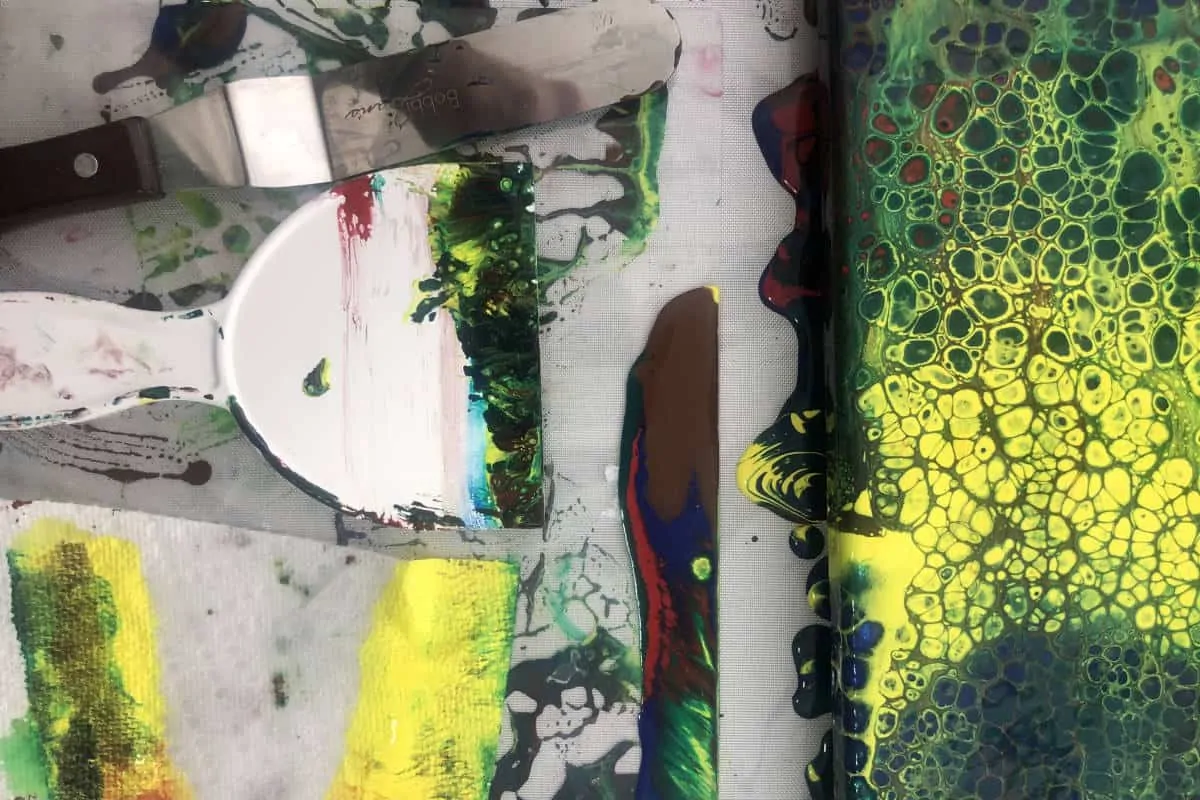
Other Common Swipe Tools
As we eluded to in the materials section, there are a plethora of different tools you can use the do a swipe.
The most commons ones that we have seen are a long palette knife, a frosting spatula, a transparency sheet, wax paper, or plastic wrap (saran wrap).
Each one takes a little practice to master so you aren’t pulling too much paint with your swipe. Try practicing a few times with your swipe tool of choice to get a better feel for how it works for you.
Torch (5)
With acrylic paint pouring, torching is most often used to pop any air bubbles in the painting surface. With an acrylic swipe pour, we also use the torch to coax additional cells out and to facilitate the creation of lacing.
Very gently use your torch or heating device to warm the surface of the painting. This will allow the silicone to slowly work its way to the surface.
In addition, heating the swipe paint on top of the canvas will make it less viscous and allow it to move more freely. With heavier paints, this heating causes the paint to converge on itself as it is pulled down through the lighter paint.
This leaves a little bit of the swiped paint on the surface which is the reason for the webbing or lacing that you see in many acrylic pour swipes.
There is lots more information about the effects of torching your acrylic pours in our blog post Why Do You Torch Acrylic Pours?
If you are still in need of a heating device for your acrylic pouring, we’ve also taken the time to test a few out and have our recommendation for you here.
Heat the Paint Slowly
Be very careful when you are heating the surface of your swipe. The idea is only to slowly heat up the paint to help facilitate different effects. If you put your flame too close the surface or leave it for too long you will burn your paint and ruing your artwork.
Tilt and Add Paint to Cover (6)
The last step is to tilt any excess paint that the swipe created. This will generally be the swipe paint on one side of the painting surface or a buildup of paint on the opposite side of the canvas.
If you do need to remove any paint, tilt your surface very slightly and let the paint take its time running off. This way you aren’t disturbing the center of your fluid pour.
For those paintings that just aren’t what you expected, try tilting off the parts you didn’t like. Just keep in mind that any cells or lacing will get deformed with said tiling if done for too long or at too steep of an angle.
Don’t Forget the Edges . . . Again
As always, check your edges before you call your piece complete. If you have any bare spots, you can use additional paint from the drippings or any excess paint you have in your cups.
Take one of your stirring sticks or a palette knife to the underside of all the edges to remove the dripping paint. Any paint that is dripping will gradually pull the on the sides which pulls the paint from the top also.
BONUS – Admire Your Work!
You’ve done it. You now know how to do the acrylic paint swipe technique. Now it is time to take a good look at your newest creation.
If this was your first attempt at a swipe, it may not be the greatest thing you’ve ever created. That is OK though. We don’t learn by doing this perfectly every time. We get better every time we paint and there is always something to learn.
Take a moment to reflect on what worked and what you wish you could change. Write it down so you don’t forget the next time you do a swipe pour.
You came, you saw, and you created. What more can you ask for?
David Voorhies

Wish I found your sure when I was new to this. Great job explaining all the steps.
You’re here now. Hopefully we can help each other to improve our acrylic pours even more.
Dear Mr. Voorhies, just wondering if you used to work for the airlines. My family and I met a Mr. Voorhies and his wife around the pool in St. Kitts many years ago. I am from Canada. Cheers in any case!
Unfortunately no. My father and grandfather are a single line. I am sure we are related just not closely.
Hi David. It’s my first post/question ever. Why my metallic paints don’t show on finished painting
Any chance you could send some pictures to the email address on my contact page? Hard to tell without seeing them.
I notice you don’t use a flow extender. Why is that?
I do occasionally especially for swipes and other techniques where I want the paint to create lacing. Otherwise I haven’t noticed a need for it.
What do you use as a basecoat, and can you use silk emulsion with pouring medium for a base and what would be the ratio, for both.
For everything but the Sheleeart blooms and Pearl Cells I use the same paint and mixture I am using for the pour as the base coat. I haven’t tried silk emulsion but I’ll add that to my list.
Hi David :
Thanks for your kind helps , I have a question about swipe. Can the swipe paint be poured on the top of the canvas and we swipe to the bottom, or should it necessary be in the mid canvas ? Thank you . ( I am not an artist in nature , I am a pharmacist and do pour painting to relax sometimes😆)
You can swipe from top to bottom for sure. I’ve seen them done from the center out (like a star) and the outside in (like a whirlpool) and all sorts of different directions.
What do you use as a basecoat, and can you use silk emulsion with pouring medium for a base and what would be the ratio, for both.
Fellow fluid acrylics artist financed by a career in applications and data. I find your posts here and on YouTube really helpful; being of a certain “logical” mindset, your descriptions of consistency, ratios and technique hit home. “Warm honey” leaves me with a furrowed brow; your pouring medium to paint percentages by density is something I can work with.
Yeah, there are a lot of us that just think different. That’s the primary reason I created this website and YouTube channel.
Hi, I’m confused by your instructions, sorry 🙈
You say to add silicone to the base colour and not the swipe colour, but as soon as the silicone touches the canvas there will be exposed areas.
If I’m going to try swiping a dark blue-covered canvas
with silver and gold, does the silver and gold lines need to be thicker or thinner than the blue base?
Thanks, vicki
That can happen for sure but here are a few things you can do to limit those divots. Almost every time I use silicone I paint my canvas first to make sure that doesn’t happen. You could also be using too much silicone. You don’t need much to get good cells. I recommend one very small drop per 2 ounces (60 grams) of paint. Mix well before pouring on the canvas so the silicone doesn’t accumulate in to big blobs. Those big blobs are the ones that make the big divots.
Some pouring mediums also are prone to divots like Liquitex Pouring medium. I don’t recommend using silicone with that medium.
I don’t know if I’m the only one having this issue, but when I only do two parts floetrol to one part Artist’s Loft student level Acrylic Paint, the paint is still too thick for me to pour with. I have to use at least four parts floetrol to get a consistency that’s easy to work with.
You are not. After 2 parts floetrol and one part paint I think the paint color starts to get less bright. From there I use water to thin my paints. It generally takes up to another 1/2 part water to get the right consistency. If you like the finished results color at 4:1 ratio than keep doing that. There is no harm either way Sydney.
Hi David, sorry I asked about base paint previously- you say “ For a swipe, we want the paint consistency of the to be slightly thinner than a basic acrylic pour. This ensures that the swipe paint can easily glide across the base paint without getting too caught up in each other. ” Consistency of the what? Base colour or swipe colour. You’re the only one to have broken it down, but this bit is key for me. Help. Thanks 😊
The base should be slightly thicker than the swipe paint. Not a huge amount but a bit. It makes the “swiping” easier to do and produces the best cells/lacing.
I’ve been doing acrylic pours for a little over a year now (although not quite as often as I feel I should be doing them) and there are still a few techniques that intimidate me to try. I decided to try a swipe for the first time the other day and I just wanted to say, your instructions are PERFECT! May have also been a bit of beginner’s luck for me, but my first ever swipe turned out amazing! I just wanted to say thank you for breaking down the steps and making the process so easy to follow. I’m so glad to have found your site and YouTube channel. I find myself coming here often for tips on pouring and you are by far one of my favorite fluid artists to learn from! I look forward to continue watching your videos and visiting your site throughout the rest of my paint pouring adventures! 🙂
That is amazing to hear! Well done. Swipes can be difficult but man are they amazing when they turn out aren’t they?
Should I have a solid base covering the entire canvas before I lay down my other colors in rows and should that b same consistency
You don’t have to have everything covered if you plan on tilting anyways. You do want everything to be the same consistency except for the swipe color which is usually slightly thinner.
i really do not understand the obsession with keeping the cells round or round-ish – i find that twisty irregular shaped cells are so much cooler in a pour. Just always hearing tips about keeping the cells regular shaped – sure it is a skilled demonstration of technique – but then have at it and get some funky shapes!
I totally get that. I love a painting with a dozen crazy large cells and then calm and serene paint around it. Hard to do but a fantastic outcome. All the looks have their time and place like you say.
Hi David, I’m having a little a little bit of a problem and was hoping you could possibly help. I have tried many times to do a swipe. I don’t no if my paint consistency is off (which I’m going to use your recipe today) or if I’m pressing to hard or not hard enough. I have been painting for about 2 years now. Before I started painting I did flower arrangements and I made pillows and other things, so I kinda lol know what I’m doing but I’m a newbie. Could you please help me out? Thank you so much for site, I have followed it for sometimes now and it’s really helpful.
Any chance you could send some pictures to the contact form on the website here? It would be much easier to figure out what is wrong if I could see the results of the past tries.
Hi David, Thanks so much for maintaining a beautifully detailed site. I am very new to pour painting and learning so much from you!
I want to try out the swipe technique – I am using CraftSmart base colors and Artist’s Loft titanium white as my swipe color. I am planning to use a 2:1 Glue-all medium to paint mix for all colors/brands. Is this going to be a problem mixing brands having differences in pigment densities?
It is not a problem mixing brands. For the craft paint I would only do 1:1. It just doesn’t have the color depth a regular paint does and will look very dull. The Titanium can still be 2:1.
Oh wow David, just found your site on swiping and the instructions were great. Going home to try it. I am unable to get cells now. When I first started I got beautiful cells. Now for some reason it is really a struggle. I would like an honest evaluation of a couple of pieces of my work. Is it possible if I sent you a couple of photos? I am excited to looking at other You tube instruction from you. Thank you, a great teacher.
Dee Anderson
Absolutely you can. If you go to my contact us form there is an email you can send to. I’d love to see your work Dee.
Your tutorials are so helpful! You are clear and concise, which is what a newby to pouring needs and appreciates. In the couple of months since I started, there have been some real disasters. But I’m learning – and most importantly, having fun! Thank you for setting me on the path to doing better!
Learning and having fun. Those are the two most important things Karen. So glad to hear you keeping on even while “learning” with the not so good paintings.
I am a beginner in the process of collecting the supplies to get started and haven’t read through your entire blog yet. My question is what do you do with the canvases that didn’t work out properly? Can they be reused or repurposed? Thanks for sharing your knowledge!
You can totally paint over canvases you didn’t like once they are dried and cured.
Keep it up Guru. You give me faith that someday I will be happy, no make that happier. At 77 I am having a ball, well at least a water filled time. Huck P.S. Remember I am using my wife’s computer and Email
No problemo Huck. We are all constantly learning. That’s actually my favorite part of painting.
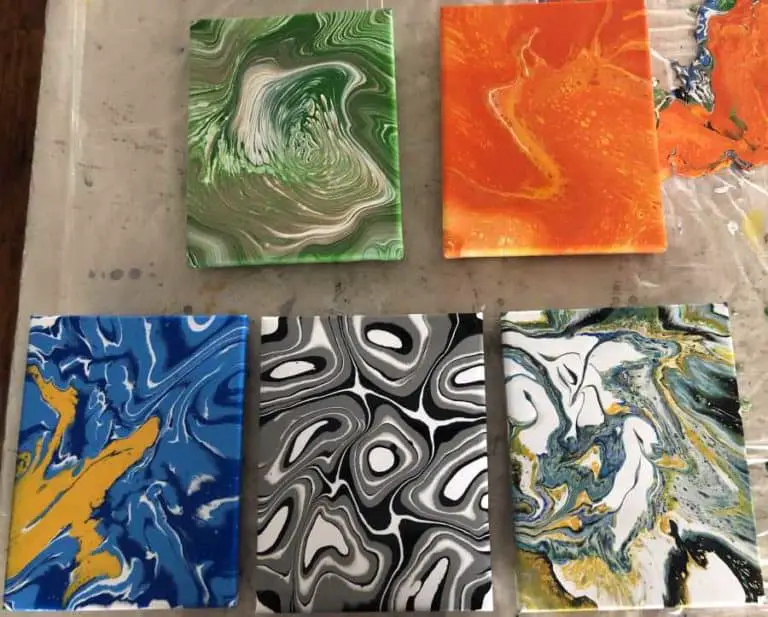
I love your website and all of your analysis and comparisons … I started on 4×4 canvas but find better results in ceramic tiles. Thanks for your recipes for swipe and techniques with paper towels … it works like magic! Have a great day!
Thanks so much for the lovely comment Coleen. This is exactly why I created this website and my YouTube channel.
I am considering the possibility of swiping and then going back and doing several bead pours to create flower burst in the area with fewer cells. Is that feasable? Again, I am still learning and I would try this first on watercolor paper or a canvas panel, Still getting warping on both of those but they make good practice pours before I do a canvas. I will be glad when I use up all the old paints my wife has collected. She is now more into alcohol ink and multi media projects since she is more right brained than me.
You sure can mix techniques like that. Just make sure you tilt before you start the bead pulls/chain pulls as having too much paint moving around will really ruin those.
You recommend titanium white as base colour because its heavier but you just finished saying before that that the swipe colour should be heavier so it can slide across the base colours and that the base coat should be thinner? Which is it? Are the coloured paints under the swipe thinner and lighter weight? or are they thicker than the swipe paint? Or perhaps I don’t understand what base coat is? I have read this article three times. I’m still utterly confused and distressed. What is a base coat? Is it the colours under the swipe? Or is it a kind of sealer for the canvas. Most importantly which is thicker the swipe colour or the paints under it? Which is denser the swipe or the colours under it. Please reply. I’ve wasted too much time trying to decipher your notes.
Oh man, that article is 2 years old and I didn’t catch that when it was written and I think you’re the first one to point it out. The that should absolutely read “For a beginner, we recommend you use a titanium white as your swipe color.” I have fixed it now. Sorry about the confusion Pam and thank you so much for pointing it out.
You want heavy on top and lighter underneath. Bottom colors are slightly (very slightly) thicker than the top color to get the best swipe effect.
Ah, your last comment, I think helps me a bit. I’ve been thinking that the swipe colour should be heavier AND thicker. I’ve recently learned that Mars Black is specifically the best for swiping, but I’m yet to try it as slightly thinner than my base colours. sO much to learn!
That’s one of the reasons I love pouring. I get to experiment so much.
Hi David. This is great. I have just attempted an Infinity pour using Amsterdam paints and
Floetrol. One cup was 4 colors and the other black and white. The result was great but it produced millions of cells that I did not expect. I mixed the paints in the house but did the poor in the Garage where the Temperature was zero centigrade. I have a feeling that this had the effect of causing the cells when I torched.
Any way my question is when you say the swipe paint should be a higher weight (specific gravity) is it not also true that the swipe paint is generally made thinner than the pour paints or have I got this wrong?
If the density is higher and the paint in cell reactive (like Amsterdam) you can get cells with the exact same consistency. However, making the swipe paint slightly thinner allows the surface tension to be lessened and gives you an even better chance to get lacing/cells with a swipe so I normally recommend doing both. Not a ton thinner. Just slightly.
Thanks David. Just caught your video of the giant “Fiona Flower” . I invented one of these contraptions a few weeks ago and I thought I was the only one to think of it. Your result was really brilliant. Mine was a write off but I keep trying.
Your videos are amazing. Keep up the good work.I’ve leaned so much from you.
Hi! Love your videos-thanks. I watched your video comparing Amsterdam and a couple others for cell reaction. I tried a swipe using Amsterdam titanium white over top of my usual NicPro paints but it just left a white film overtop, hardly any colour came through, and the few cells that did form were very tiny. I didn’t use any silicone as I was under the impression that Amsterdam would react on its own. I mixed the white and colours with floetrol (Canadian/American). 2 parts floetrol, 1 part paint, a little water to consistency of small mound disappearing quickly. I torched after with little change. Any ideas what I did wrong? Maybe I need to thin the white? Thanks much.
Amsterdam does react but not to all paints. I haven’t ever worked with NicPro paints so not sure why you got the reaction you did there. The first thing I would normally do there is make sure the white was thinner slightly than the other paints.
Thanks for the reply! I tried today with black amsterdam and this time I used the precious and expensive australian floetrol and it worked well. I made sure my black was thinner than the others.
I will try the thinning my white with regular floetrol again but thin it down.
I’ve learned a lot from your videos – really appreciate your ‘left brained’ approach to understanding things.
Hello David,
You mentioned that you give classes in person. Do you still do that?
I’m so grateful for everything you have shared with us beginners!
Heather
I haven’t done them for a year or so.
David
You provide a great service to the community.
I’m a little confused about paint weight/density/“thinness”: I get why a heavier density paint works as a swipe in that it sinks through the lighter density base. BUT you also say the swipe should be
‘Thinner”. I construed “thinner” to mean more dilute, which makes it less dense (unless water and/or pouring media are denser than the paint). Could you clarify?
Many thanks
If all the paints are thinner than the relative density, compared to all the other paints, is the same as if they were all thicker. Only when you consistency differences between the paints do you get relative density differences. Does that make sense?
I just want to say “Thank you for YOU.” You’ve taken the time to explain the little nuances that flick our craw out of whack wondering why something didn’t work. And you do so articulately & quite brilliantly. You explain the reasons without making them sound like excuses and bring a ‘down to earth, breath of fresh air’ to the art. Peace!
Thank you so much Elise. Are there any questions you haven’t been able to find answers to?