5 Basic Acrylic Pour Techniques to Master
Painters find inspiration for their art in everyday life. Muses are discovered in the natural world, in family and friends, and in the mysterious and fantastic. In the 21st century, the internet gives acrylic pouring artists an excess of material to emulate.
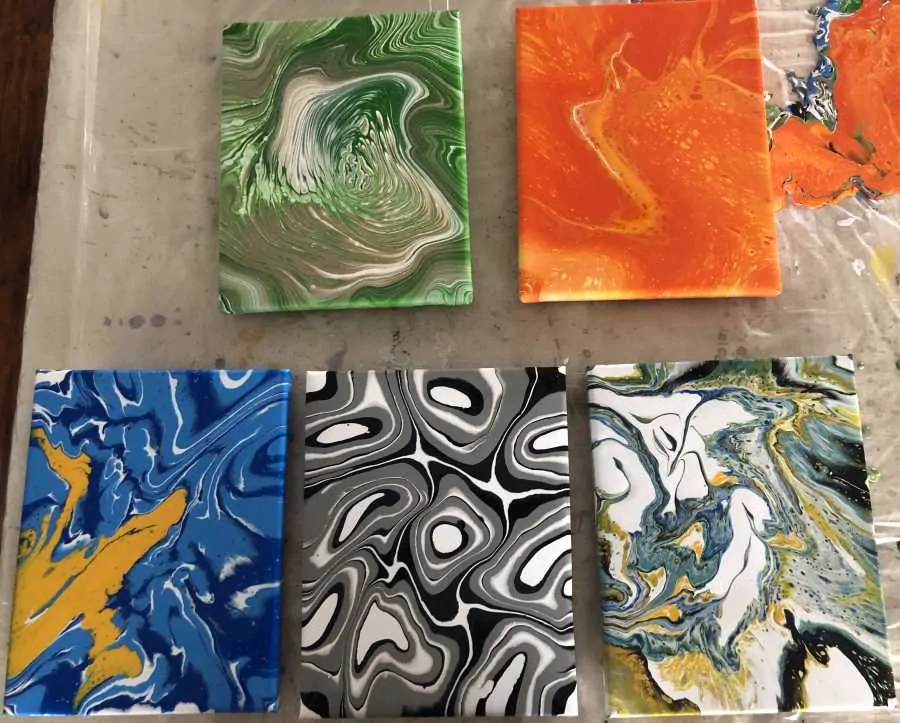
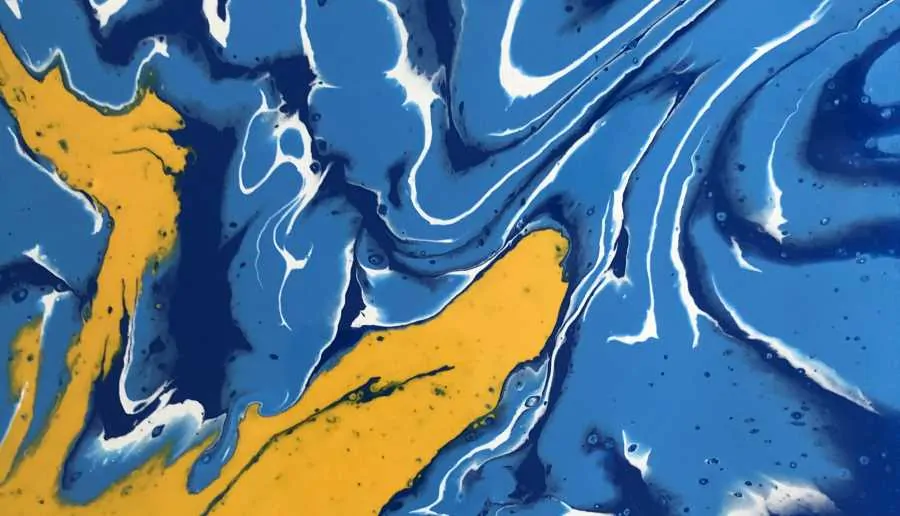
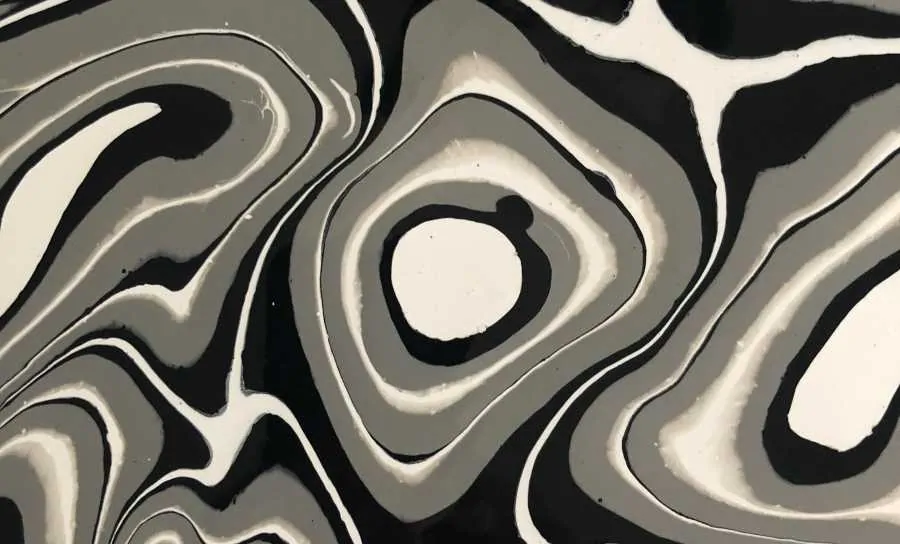
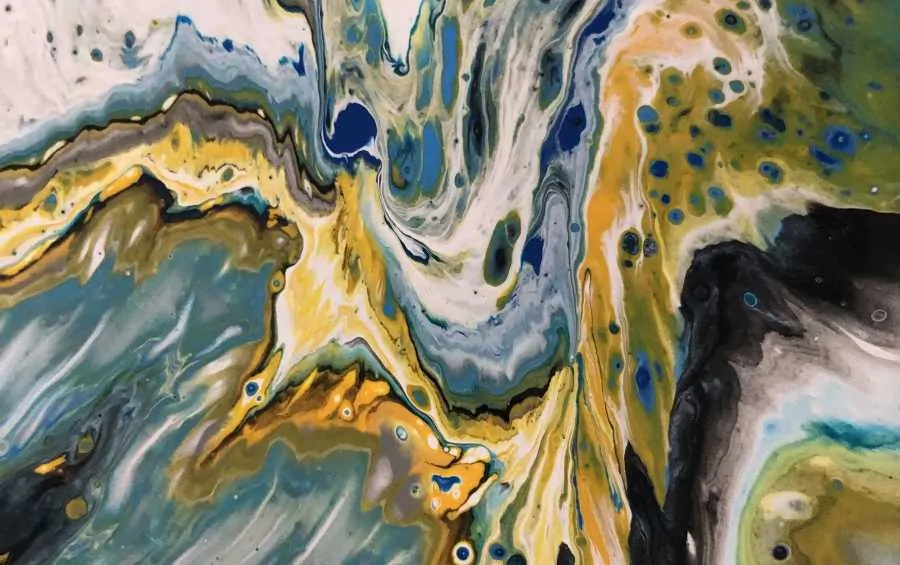
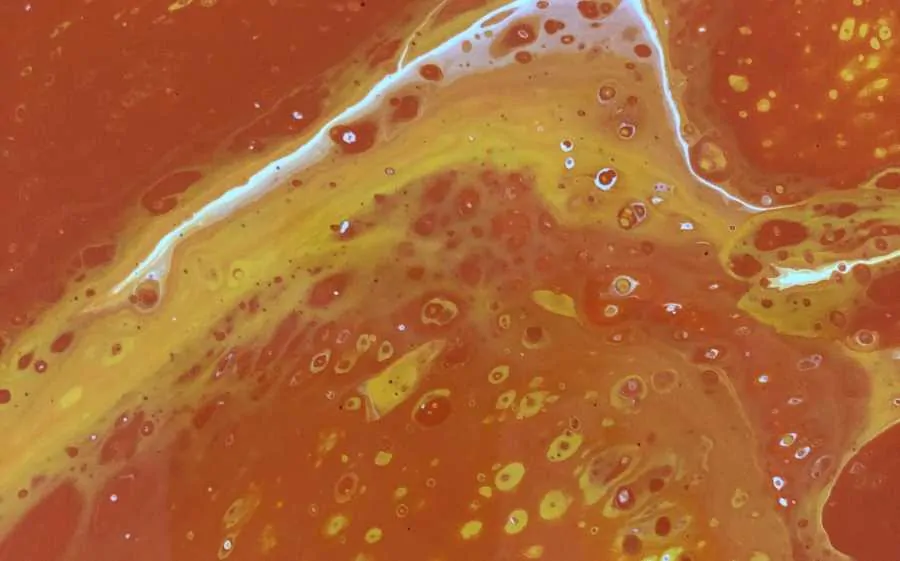
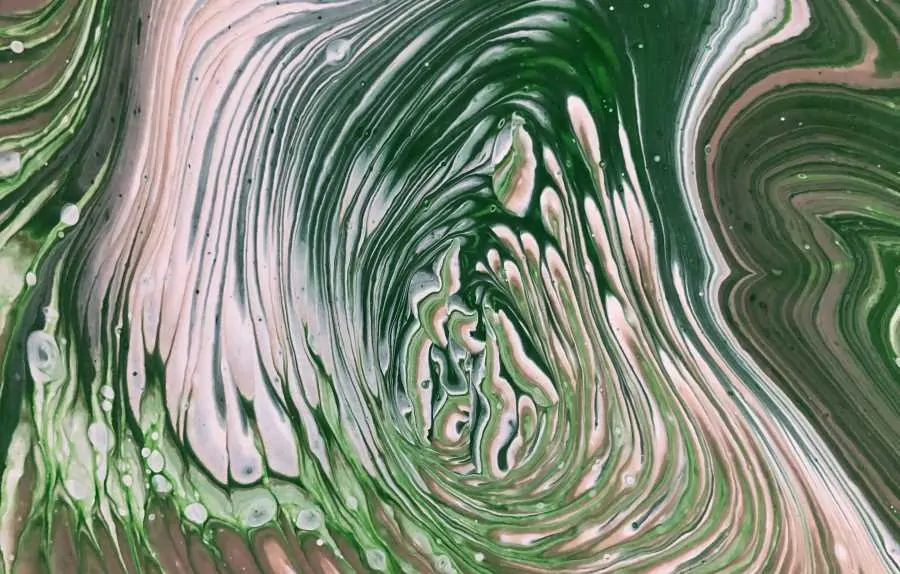
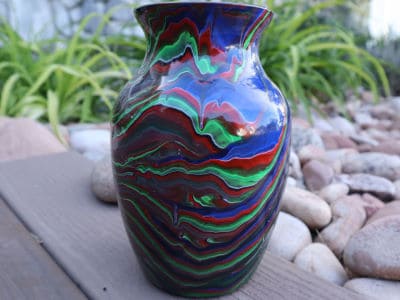
Fluid acrylic paint pouring techniques very widely depending on the artist, medium, pigment, and painting surface. The most basic acrylic pouring techniques are the traditional pour, the puddle pour, the dirty pour, the tree-ring pour, and the flip cup pour. While common, each of these fluid acrylic pour methods can produce amazing artwork.
When you master the subtleties of these basic pour techniques, you will find that the more involved techniques become easier to be successful with.
NOTE: During this article we will be referring to canvas as the painting surface for uniformity’s sake. You can use any painting surface you like with each of these methods. Some surfaces may require a priming or gesso coat before painting.
NOTE: Each of these paint pouring technique explanations assumes that you already know how to mix your acrylic paint to the “pouring” consistency used in most fluid acrylic pours. If this consistency needs to be changed it will be noted in the pouring technique explanation.
Traditional Pour
The traditional acrylic pour is the most basic of all acrylic pouring techniques. This pour involves mixing paint in separate containers and then pouring the paint onto the canvas color by color.
The colors can be poured in a variety of different methods to create completely different pieces of art.
Traditional Pour Pros
- easy to do
- painting has pure veins of color
- control of where each color goes
Traditional Pour Cons
- colors do not interact with other colors very much
- harder to create complex designs.
Traditional Pour Variations
- try sprinkling the paint on with your paint stick or a spoon rather than pouring everything.
- layer colors on top of each other at different intervals to create new colors and designs.
- use common shapes and patters to give some uniformity and familiarity to your pours.
Puddle Pour
The puddle pour is a more uniform method based on the traditional pour. Rather than pouring the colors randomly on the canvas, you pour “puddles” of each color. You expand each of these puddles by pouring additional colors into the center of the puddle.
You can either pour large quantities so that the paint is very pronounced, or small quantities so that you get lots of color variation as the puddles expand.
Puddle Pour Pros
- you have control of which colors interact with each other
- easy to create solid color patters
Puddle Pour Cons
- colors do not interact with other colors very much
- very little chance of cells or other interesting features
Puddle Pour Variations
- try pouring many small puddles with multiple colors. Then when you tip and move your canvas to spread the paint those different puddles run into each other and create abstract shapes.
- on the flip side, if you use enough paint you can keep all your puddles naturally circular and you don’t have to tip and move your canvas at all.
Dirty Pour
The dirty pour technique is a slight deviation from the traditional pour. With this technique, after the colors are mixed in their separate containers, they are poured into a single large container. This single larger container is then poured onto the canvas.
The colors can be poured into the larger container a little at a time in multiple layers or they can be poured one by one in their entirety.
Dirty Pour Pros
- color get to mix in to cup before being poured on the canvas
- more colors are created during the pouring process
Dirty Pour Cons
- less control of where colors go
- color selection becomes more important so that undesired colors are not created
Dirty Pour Variations
- with the last little bit of paint at the bottom of the dirty pour cup, try pouring this across your other paint. The dregs of a dirty pour cup have multiple colors in a very confined area which gives a ribbon like effect when poured across other paint.
Flip Cup
Now that you’ve learned the dirty pour technique it’s time to advance to the flip cup. To create a flip cup, prepare your dirty pour cup as instructed above. Rather than pour your flip cup on the canvas, quickly overturn the cup onto the canvas. Most of the paint should remain in the cup with the canvas becoming the “lid” and keeping the paint inside the cup.
Wait a few minutes for the paint to fall to the bottom of the overturned cup. A clear container makes it easier to tell when the paint has all settled to the bottom. Now lift the cup off the canvas and let the paint flow out.
Flip Cup Pros
- color get to mix in to cup before being poured on the canvas
- more colors are created during the pouring process
- layer the paint with the “heaviest” going in the bottom of the flip cup can help the creation of cells (learn more about cells here)
Flip Cup Cons
- less control of where colors go
- color selection become more important so that undesired colors are not created
- color laying is very important as color density considerations affect how the pour turns out
- Lookup your paint’s relative density with our Acrylic Paint Density Chart.
- potential mess if not done correctly
Flip Cup Variations
- take your canvas and place it upside down on top of your flip cup with the flip cup in the center of the canvas. Now hold the canvas and the flip cup together and turn the canvas upside up. The paint should stay in the cup because the canvas is acting as the “lid”. Wait a few moments for the paint to settle and remove the cup and let the paint flop out.
- after flipping the cup on the canvas and before lifting the cup, coat the rest of the canvas with a very thin layer of paint. We recommend you use white to begin with. Then poke a very small hold in the top of the cup with a sewing pin or some other share object. The paint will begin to flow out of the bottom of the cup slowly. Gradually lift and tilt the canvas while the cup is still overturned.
- place the flip cup on one side of the canvas. Before removing the cup, lift the side of the canvas where the flip cup is slightly so that the paint will run away from that side toward the rest of the canvas. This lets the paint spread out quickly without falling off the canvas.
- flip and drag is where you do the same as the above but when you flip the cup you keep it only slightly off the canvas and you quickly move the cup where you want it to go along the painting surface.
Tree Ring Pour
The tree ring pour method also begins with a dirty pour cup of paint. Once the cup is prepared you will be pouring the paint in center of the canvas only. However, when pouring the paint, we want a SMALL steady flow of paint to come out of the cup and we want to move the cup back and forth a ½” or so constantly as we pour. You can use a small circular motion also.
This slow movement back and forth as we pour is what creates the “rings” in the tree ring pour. As more paint lands on the canvas the rings expand outward creating an effect like rings in the cross section of a tree trunk.
Tree Ring Pour Pros
- relatively easy to do
- contrasting colors make beautiful pours
- no need for cells
Tree Ring Pour Cons
- the colors you use can make or break the pour
- cells can detract from the overall look of the pour
- you must use a lot of paint if you want a proportioned circular shape. Tilting and spreading paint cause the perfectly circular pours to get distorted
Tree Ring Pour Variations
- swirl Pour is another name for a tree ring pour which doesn’t always stay in the same place as you pour. Just follow the same steps as previously and gradually move in any direction while you pour doing your side to side or circular agitations.
- you can create the look of a tornado with your tree ring pour by traveling straight across the canvas as you pour and then by coming right back along the same path with the last little bit of paint.
- the kiss tree ring pour involves preparing two dirty pour cups and then pouring them together. The paint from each should mix as they are coming out of the cup thus creating two tree ring pours where the paint is kissing before falling onto the canvas. This may take a little practice but can be very rewarding when the painting is finished.
Conclusion
Experimentation is the key to unlocking your true potential with acrylic paint pouring. Half of the fun with paint pouring is exploring new techniques and color combinations. Every pour is a new learning experience.
Try these 5 basic acrylic pouring techniques. Keep notes of how your pour turned out, things you think of during the pour, and observations on what you want to change the next time you pour. Once you’ve mastered these, try our 16 Advanced Acrylic Pour Techniques.
Use these notes the next time you do a similar pour so that you can continue to improve and adapt based on your own personal style.
Want to try some new paints? Check our our Best Acrylic Paint for Pouring article.


Thank you for making this information readily available. I have been experimenting with acrylic pours for about a year and I am learning a lot-with much more to learn. The variations in techniques and colors makes this process so exciting. I love the fact that I have had to learn to give up control over the end result. The trade off for “losing control” is gaining an better understanding of the properties of paint and the how various thinning mediums (Floetrol, GAC) and additives (silicone, alcohol) can be used to influence the overall effect. A true blend of science and art wouldn’t you say?
Thanks again.
Absolutely a blend or art and science. That is really what got me hooked in the first place.
Nice tutorial!
I can’t seem to get cells even with silicone! By blow dryer technique just turns muddy!!!
Help
My first reaction would be that your paint is too thin. For cells with silicone you want paint that creates a mound then dissipates if you drip is straight in. If you swirl it while dripping into the cup the design should stay for a 2/3 seconds and then disappear into the cup. I recommend starting with one drop per 3 ounces (90 grams) of paint so that you get distinct cells but not too many. After you master that then you can add more or less depending on the number of cells you want to form. Heating the surface of the paint up SLOWELY after pouring is key to getting that silicone to come up to the surface and make cells.
Hi , As a complete new “paint pourer,” I find your information and ideas just great. There is so much to learn. I’d like to class you as a “book of knowledge.”
I have a 20lt pail full of Resene ceiling paint and wonder if & how this could be used. I have 3 banana boxes full of old artcraft acrylic paint of which some have dried rather hard. Have tried water but no-go! What would you suggest I try next.
With old paint I have found a little isopropyl alcohol (drops) sometimes brings it back to life. If that doesn’t work, it isn’t work taking the time to make it better. You’ll always have lumps or inconsistent colors/consistency.
Ceiling paint is rough because it is a flat texture which doesn’t work too well with pouring paint. You can try to use it as a base but as of yet I haven’t had good experience with ceiling paint.
David, thank you so much for sharing your knowledge and experiences . I am just beginning to do my own pours but have watched countless youtube videos. While they have all been interesting and enjoyable to watch, I don’t think any of them have explained things as well as you do. Please keep up the good work!
Thanks again
You are very welcome Diston. Have you done your first pour? My latest video on the YouTube channel is all about how you need to get started ASAP.
I saw a video with blown flowers & want to learn. What would my basic beginner supply list consist of? Do you have any flower videos or tutorials? I think I found my passion project!! THANK YOU
Those are the SheleeArt blooms. I have a couple YouTube videos about these but not an article.
Hi David,
Your method of teaching paint pouring is very informative, so helpful, and really makes this art form so approachable to novices. I especially found your video about the varnishing process that does not leave brush strokes (yuk), lots of wasted time, paint and canvases!
Ok, I have just finished my first and second varnish jobs, right on David…they are perfect and I am one happy pour painter!! Because of COVID I have been very busy with this new venture for almost an entire year and now I can finally start to varnish!! Many thanks for all of your suggestions and help. A fan forever!!
That is excellent to hear Natalie. I feel you on wasting time on canvases. I have a dozen with brush marks that I am thinking of either heavily varnishing or doing a resin layer. Don’t hesitate to ask any more questions you have here on my YouTube channel. I love getting new video and blog post ideas.
Hey Natalie, I’m very new to pouring myself I watched videos and got more and more confused. I was able one time to find a paint pouring kit at five below and basically they came with everything I needed to pour on canvases. It came with canvas boards, paint ready to pour, stirring sticks, and even silicone. My only point on this is that once I actually did this and it was shown to me how simple it was I learn more from that experience than watching any video.
So absolutely true Craig. Doing is the best teacher.
Oh wow! I need to look at 5 Below!
I’m having so much trouble getting good cells in mine so far. Any suggestions?
Have you seen my article and video about cells? It goes through the different ways to create cells. I can’t link directly here but if you search either here or on my youtube channel (same name) for cells you’ll see them.
I’m super glad to have stumbled across your site! I have watched several videos of yours on YouTube but as one of the foil hatters I obviously prefer to supply patronage to the platform as much as I can lol.. many thanks again for the straightforwardness of the material you present though! I personally find a good set of written instructions to be infallible, which is exactly what you’ve provided here! Keep on keeping on mang!
Thank you so much Jennifer. I need to get some more guides written on my website. A bunch of people have said the same thing recently. I appreciate your patronage and am always listening for new ideas for videos and blog posts.
Hi there
I am going through your website voraciously and you have so much valuable information here. No need to search anywhere else really. Just go through all the info here, watch your youtube videos and get started. That is what my girlfriends are planning to do this weekend. Complete noobs here so no idea how it will turn out, but we will have fun doing it. A question for you. What silicon do you recommend to create the cells. I can’t seem to find that info anywhere on your website. Or have not looked properly, in which case I apologize.
Thanks
Amisha
I use Spot On Treadmill silicone from Amazon. They have a Pouring version that is the same thing relabeled with a few extra attachments. The best place to find that is my video on acrylic pour cells. Search YouTube and you’ll find it.
Thanks so much for the quick response. I will search for it on Amazon. Appreciate your advice.
I have so many paintings because its fun and addictive. What do you do with all of yours? I don’t intend to sell anything, mine aren’t that good. How many times can I paint over a canvas?
Two or three times is the most I have found. Then the surface imperfects really start to show through. Technically as long as you let them fully dry and cure (weeks) you can paint over them until they aren’t flat anymore.
Thank you for your very informative videos and suggestions for acrylic pours. I have been painting my whole life and was always a frustrated teacher[ primary ] as art and drawing were always my first love. Usually paint large canvasses in oils and cannot decide between painting abstract portraits , landscapes , abstracts or figurative work., probably because I’m self taught. Have been experimenting with acrylic pours and painting with resin and feel very uncontrolled with both as I’m impatient and have had a few disasters but I never give up. Can I get cells if I put silicon oil directly into my resin pours? I love pouring directly with resin but love the cells in acrylic pours. As I say I’m very unfocused at times.
Resin and silicone are bad combinations. They cause the resin to move a dimple. I would not want to use them together. I haven’t done a lot of resin work other than as a top coat for my painitng and any painting that I used resin in that I don’t 100% clean off causes all sorts of bad results for the top coat.
I am just starting to pour a I am confused about what mixture is for what pouring. Can you tell me the mixture of paint and glue and water for glass pours? I don’t have a scale. I mixed a bath of medium 2/3 glue to 1/3 water is this right? I have been trying to get the mixture right for glass pours but they blend together and look as if they are all the same. No real coulomb they blend together. Thank you so much
For 3d objects you want your paint to be slightly thicker than a normal pour on a flat surface. If you are using glue maybe cut it down to 3/4 glue 1/4 water or even don’t use any water until the end and just add water till it flows but is still thicker than a normal mixture.
Hi David, like everyone else, thank you so much for your time and shared passion. I am enjoying successes and failures but you have given me a great hobby. Do I need to obtain a spinning platform (not sure what it is really called). I don’t know where to access one either. I have everything else. Thank you 😊
You don’t need one. They are fun to have though. I use a cake spinner but a lot of people use a lazy suzan too.
I would like a video that shows the consistency of paint up close to see how it drips back into the paint. Saying it’s like honey or cream doesn’t mean a thing to me. I want to see it up close. Thanks
I do have a video about this. I have links disabled in my comments but if you search YouTube for “Acrylic pour paint consistency can make or break your art!” you will find my video. There is also a blog post on this website called “How to Prepare Acrylic Paint for Pouring”.