Acrylic Pour Painting on Glass: The Complete Guide
Acrylic paint is a versatile material for a wide range of interesting art projects. When applied on glass, it can provide a whimsical and interesting pattern, especially when many colors are used. Acrylic pour painting can be applied to a variety of materials, but glass will give you the most visibility from all directions.
How to create acrylic pour painting on glass:
- Select paints and glass object
- Combine acrylic paint colors
- Prepare glass for paint and clear a work area
- Pour paint onto glass in unique patterns
- Let dry
- Finish with sealer or varnish
Not only will we explain the best practices for cool acrylic pour painting results but share some interesting techniques to try on different glass materials. This style of painting is freeform, allowing you to be creative and giving you different results each time so that no two pieces will be exactly the same.
How to Make Acrylic Pour Paintings on Glass
The steps for acrylic pour painting are fairly similar from material to material. They all involve combining acrylic paints and pouring them in different patterns onto an object. In this case, we will be using glass as our workpiece. Glass is particularly interesting for this style of painting because you can see the patterns from all sides (depending on the shape and finish of the glass object).
You should follow these steps to create unique acrylic pour paintings on glass:
- Select paint: The wide variety of acrylic paints can make choices more difficult. Because glass will allow light to shine through, you will want rich and vibrant colors that will properly cover the glass (unless you want a more opaque, or solid non-transparent, look).
- Choose glass objects: The glass you choose will be largely dependent on the project. We recommend using clear glass to get the most color visibility, but any colored glass will do based on your preference and design. Mirrors also work well as a glass surface although they can only be view from one side.
- Combine acrylic paints: Pour acrylic paints into a cup or any container that will be easy to pour. The colors you pour into the cup first will often be the last to show up on the glass. The proportions of colors will dictate how much of each end up on the glass. You will also want to add some water or a flowing medium to the paint to make it runnier and easier to spread on the glass. See our article on Preparing Acrylic Paint for Pouring for additional directions.
- Prepare glass for painting: To allow the paint to properly adhere to the glass, you will want to make sure that the glass has been cleaned and is free of any debris or dust. This will not only create imperfections but could result in the paint not sticking or flicking off in the future. You should also keep the glass raised (and level) so that the paint can drip off the edges so that it does not pool at the bottom or around the edges.
- Pour paint: Make sure you pour the paint slowly to allow for the most exposure of colors. There are multiple techniques for doing this that we will discuss later. Try to cover the entire area to maximize paint usage and complete the look.
- Allow for drying: You will need to give ample time for the piece to dry properly. Acrylic paint pours are general dry to the touch after 24-48 hours but are not completely cured for 3 weeks or longer depending on the size of the surface. Allowing the paint to fully cure before adding additional layers or sealing the paint will help prevent crack, crazing, and other imperfections.
- Add a seal or varnish: Because the exposed paint may look unfinished or flake off with time, we recommend adding a clear coat to seal the project. This will provide the greatest durability and give the glass a ‘finished’ look.
The procedure is quite similar for all acrylic pour painting projects, with the primary concerns for glass being, (1) using a clean surface, and (2) choosing quality paints that do not appear too translucent (unless that is the preferred style).
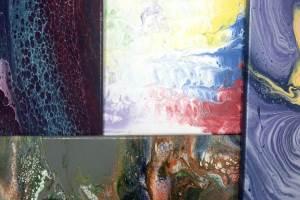
Different Styling Techniques for Acrylic Pour Painting
There are different styles and techniques you can try for your acrylic pour painting on glass. These will allow you to create various patterns and cool designs that can make each piece unique from one another. Because not every pour of paint into your cup will land the same, you are going to get a new result every time, even if you use the same amounts of paint.
Here are some cool pour painting techniques to try for varied results:
- Individual color pour: Instead of mixing the colors in one cup beforehand, you can pour individual colors on top of each other to create more dramatic and block coloring looks. You can move the glass to spread these colors out.
- Dirty pour: This is a common technique where colors are combined to make a more mixed color pattern.
- Direct pours: Pour the acrylic paint in one location and let the pool expand or fall to cover the entire piece of glass (movement will be dictated by the shape of the surface). On flat surfaces, this may be more difficult as the paint becomes thick and may not naturally flow to the outer ends of the glass.
- Flip cup pour: This will require a flat glass surface, where you will place the cup (filled with different paint colors) directly onto the surface and then lift it so that the paint falls out and on top of each other for a stacked paint look.
- Patterned pours: Only cover specific areas of the glass and then shift the glass to move the paint in desired directions. You can add additional paint mixtures to the open areas once arranged for a wavy appearance. Or, if desired, leave parts of the glass exposed for a stark contrast between the bare glass and paint.
- Feathered pattern: In a cup, add your base color and then add additional colors to one side of the cup, for your feathers, swirl paint in the cup and then continue to add your base and accent color to one side. Pour onto the glass with a small side to side motion. You can check out a tutorial of it in this video.
There is no ‘right way’ to do any acrylic pour painting as there are so many different design ideas and ways of achieving cool results. Some of the techniques mentioned above will give you a unique variety of options for the application. Varying the orientation of paint in the cup will often result in a different pattern every time.
Additional pouring techniques can be found in our articles 5 Beginner Pouring Techniques and 16 Advanced Pouring Techniques.
Project Ideas for Acrylic Pour Painting on Glass
Selecting the glass object, you will be using may oftentimes dictate the best technique based on its shape and ability to hold. Any glass surface will hold acrylic paint as long as it has been cleaned and is free of dust.
These are some popular ideas for projects you can apply the acrylic pour painting style to:
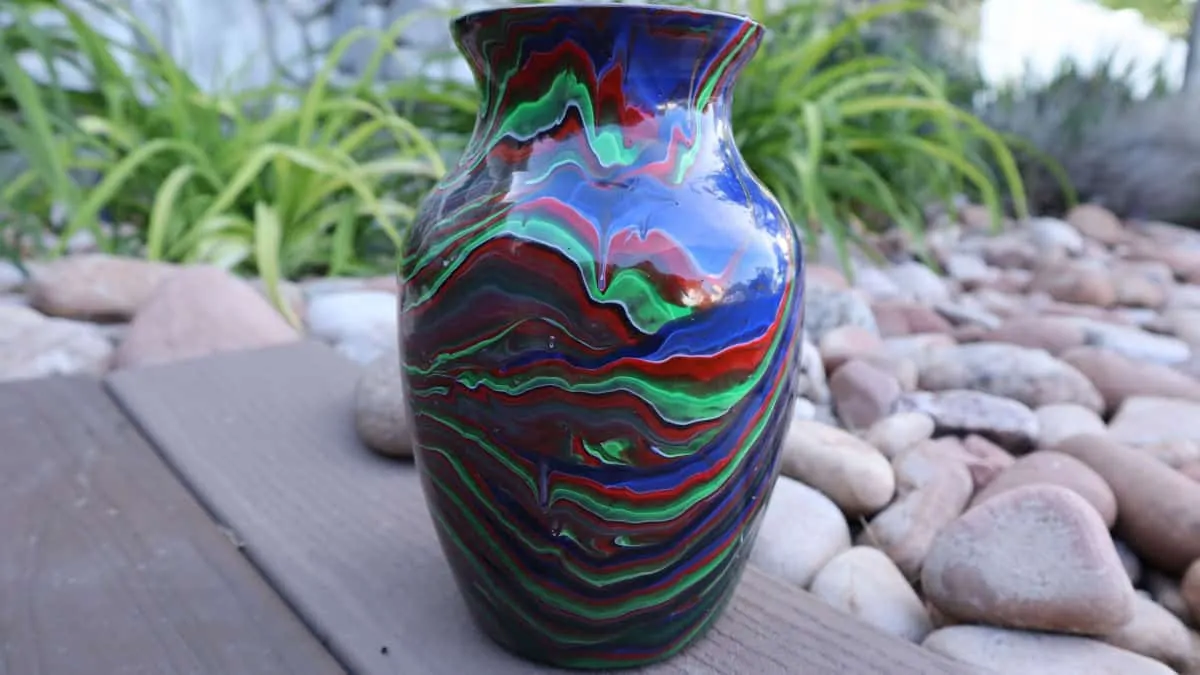
- Jars and vases: These are among the most popular to paint because they provide rich designs to the outside of glass containers with large surface areas. You’ll be able to catch the details of different colors and large patterns as they run down the surface.
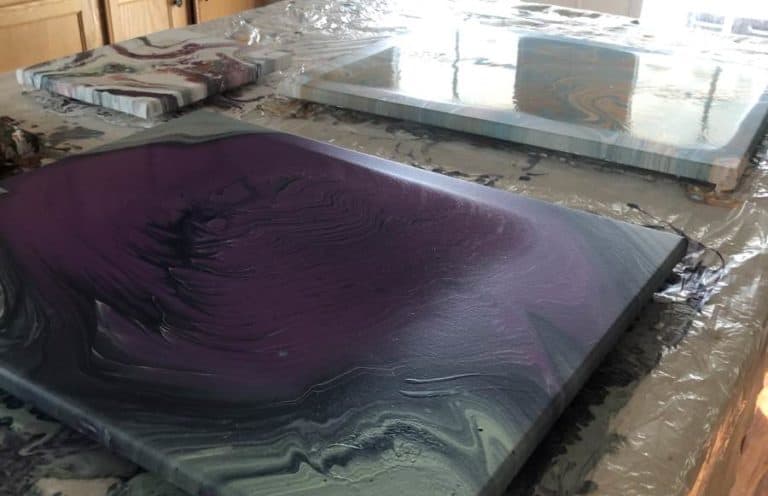
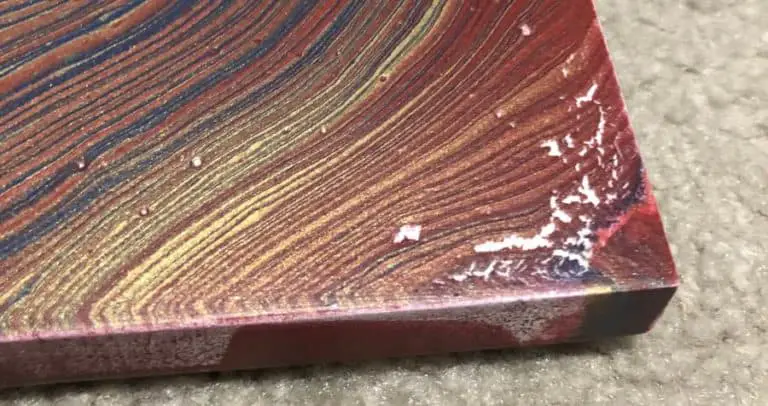
- Slabs of Glass: A flat piece of glass will best mimic a traditional canvas, allowing you to experiment with many of the techniques mentioned above. On a large window-like piece of glass, you can create unique waterfall techniques that use gravity to draw out the different designs and colors.
- Glass figures: The pour painting technique looks particularly interesting on a glass figure because of all the ridges and edges that the pattern runs along. It can draw the eye to certain shadows and curves that add another element of depth to your project.
- Decorative containers: Similar to jars, try this technique on decorative dishes, bowls for holding your keys, and other containers that may be displayed around a home or office.
- Mirrors: Mirrors are excellent glass surfaces to paint on. Many mirrors have interesting frames that can either be poured on or painting a complementary color to help the pour “pop”.
We do not recommend putting acrylic paint on glass dishware as they are not safe to consume. Acrylic paint can be used on the outside of dishware where there will be no contact with food or drinks, but this is very difficult to achieve with a pour painting technique. Acrylic paints that contain oil or enamel are toxic, while water-based are not (but they will usually wash off).
Four Tips for Best Acrylic Pour Painting Results
There are plenty of opportunities for our artwork to end up much different than we had anticipated. While following the directions for acrylic pour painting, you may still find that the results aren’t like the examples you’ve admired. We have compiled some tips that will help you achieve consistency in your projects.
It is also important to recognize that results are going to vary when applying to glass versus other surfaces. If you find a pattern you like on fabric canvas, it will most likely look different when applied to a smooth and slick surface like glass.
Our tips are going to cover four main areas:
- Color selection and theory
- Worksurface conditions
- Paint composition
- Drying protocol
These are all important factors in making your acrylic pour paintings on glass really stand out.
1. Color Selection and Theory for Acrylic Pour Painting
One of the best parts about acrylic pour painting is choosing your colors. While this is free form and highly customizable, there is some theory and technique around the best color combinations. These are merely recommendations, but they tend to achieve more desirable outcomes.
Here are some tips for choosing colors that work well together:
- Model eye-catching objects: If you see a painting or piece of art that draws you in, consider these colors for your painting on glass. This could also be something you find in nature, such as a peacock’s feather with its rich greens, blues, purples, and golds. Colors that you are drawn to often work well together, and you can achieve similar results for your art. This pleasing color effect is also known as harmony.
- Pre-made color schemes: In the event you are having a hard time coming up with a color scheme, there are many design programs that will do this for you. Start with a color that you love and let the program apply other colors that work well with it.
- Contrast: Applying colors that vary from each other (contrast) in pours will allow for the best visibility of different designs and patterns. This could be very stark differences in color or comparisons between dark and light. You can also contrast warm and cold colors against one another.
Your color preferences will dictate how you choose to combine colors, but providing these interesting juxtapositions between various colors will allow you to create really interesting pieces of art.
2. Work Surface Conditions for Acrylic Pour Painting
Your work surface can impact the outcomes of your acrylic pour paintings, where the pour looks one way, and the end result gives you something else. This can make pour paintings rather unpredictable, especially when you fell in love with how the pour looked. One of the most important things to consider for your work surface is keeping it level.
Whether working with a vase or a flat piece of glass, if it is not straight or level, the paint will drive toward the portion of the pieces that are tilted slightly downward. This can shift the entire pattern in one direction and alter your results. Make sure you are keeping the surface level, with small stands, or ensuring that the bottom of the glass itself is flat.
We recommend using stands for your acrylic pour paintings so that the edges of your glass piece can allow the paint to drip off rather than to pool. This pooling may lead to some areas being thicker than others or creating clumps.
3. Paint Composition for Acrylic Pour Painting
Your paint composition has a large impact on your results. Most acrylic paints are too thick to pour without some additives. Typically, you will want to add an acrylic medium or water to thin the paints to your desired consistency.
- Many acrylic pouring mediums should be used in a ratio of 2:1, with paint making up the smaller portion of the mixture.
- Add more as needed until you come out with your desired thickness. You can check this by letting your paint stirrer drip over the cup of paint. If it incorporates smoothly into the paint, it is the right thickness. If the paint is too thin, it will create a small depression with this same test and may not adhere properly to the glass. For 3-d glass objects slightly thicker mixtures will help cover the more vertical oriented parts of the object.
4. Drying Protocol
The paint composition will also impact the drying process. To properly dry your acrylic pour paintings, keep these tips in mind:
- Ensure paint is not too thick: Really thick paint will have a hard time drying and will result in different texturing on the glass surface. Make sure all the paints are the same consistency so that they do not run over one another, leading to longer drying times and changes in appearance.
- Keep out of direct heat sources: While this may speed up the drying process, if the surface of the paint dries too quickly, it may result in cracking as the top layer contracts more quickly than the bottom layers.
- Wait for drying before varnish: The paintings should be completed dried before you add a sealer. Otherwise, you are trapping wet paint inside of the sealant which may also cause cracking, crazing, or rippling of the varnish or underlying paints.
Acrylic Pour Painting on Glass
The acrylic pour painting technique provides a range of possibilities for unique pieces of art. With the smooth and clear surface glass offers, you can watch the patterns and colors make their way down the canvas and result in mesmerizing finishes that can be displayed on any glass object.


until about a little over 2 yrs ago, i never thought i had any artistic ability, accept for drawing stick figures! then a friend suggested i try abstract art. my 1st painting was done using a long wooden screwer and it came out pretty cool….kind of has an oriental feel. then i started watching videos and came across acrylic pour painting. shortly after trying it a few times, i became addicted. i’m still trying out the different techniques, but am loving it. i’m branching out to vases and coasters as well. this video is very helpful as well as inspiring. i’m even considering getting into pour painting as a way to refurbish furniture. some people don’t consider pour painting a true form of painting but i think it’s at least partly because they haven’t tried it!
This is so awesome to hear. I am in the same boat. I can’t even make a stick figure look good but pour painting I can get behind, especially when I am very methodical about how I approach it. Thanks for sharing Debbie. Happy pouring!
I want to pour over an ostrich egg. How do I get the paint to cover the entire shell? Thinking I would have to rotate the egg some. It would be mounted on a pole through the drain hole.
Put a base coat on. Make sure it covers everything. You might need a brush or to use your finger to get the the very bottom. Then pour over the wet base coat. The paint will almost all the way to the bottom on the slick base coat. You might have to move it a little with a brush or your finger to get it the final way.
You could also have your egg on a stick tilted slightly and then rotate it so the paint goes the bottom fine on one side then rotate it as you pour.
Thanks! I tried pouring on a half of a small goose egg & it came out pretty good. I have since put goose eggs on a stick made to hold eggs and rolled it in the drippings from pours. The 2nd one came out much better than the first one.
Awesome to hear. I don’t think I’ve ever seen a goose egg.
I am looking to do a pour over a tall cylinder candle holder and am looking to have it be transparent enough to see the candlelight. You mentioned if the paint is too thin, it may not adhere properly to the glass. What ratio of water to acrylic might work to adhere and be somewhat transparent? Thanks.
Thin enough that when you drizzle paint off the stick it forms a tiny mound and immediately disappears. If you drizzle a line of paint in a circle off your stick it disappears within a second or two. You could also just use transparent paints and do a normal pour. The light will show through pretty well. You could try on a cheap picture frame from the thrift store just to make sure. That should dry within a day and let you see a lighter though the paints you test.
I’ve been experimenting with pouring paint on glass and mirrors for almost a year. I am seeking jewel like transcluscency. To this end I’ve invested in high quality transcluscent, single pigment paint colors, in order to prevent the muddiness that can occur when too many pigments get blended together. The only time I’ve been able to achieve the translucency I’m after is when I pour individual puddles of color on the glass. I can pour different colors right next to each other and let them blend on their own and it dries beautifully transcluscent. But if I try to manipulate the pour by running a skewer thru it or blowing it thru a straw or even tilting it the transcluscency is lost. I have been searching for resources about this phenomenon, and it looks like I may be the only person in the world vexed by this! But this article is a more comprehensive resource about pouring on glass than anything else I’ve found so I thought I may as well post my findings in the comments here and see what kind of response I might get. Thanks for sharing this and keep making good content.
I haven’t tried specifically but here are my unfiltered thoughts Stephanie. Take them how you will.
Stephanie, Are you mixing any of your paints with a pouring medium of any sort? I’ve found that my colors do much better in playing together nicely instead of a puddle of mudd when I use a pouring medium mixed with my paint.
There are some methods where paint and water seems to do best for sure, the Dutch pour in particular. There are others that don’t do near as well with paint and water and a medium really gives the effects that you wants to see (flip cup, dirty pour, blooms, etc.). It really just depends on the outcome.
What varnishes or sealants would you recommend?
Lately I have been using Liquitex exclusively. I have a video on my YouTube channel, also Leftbarinedartist, that shows the method I use that is easy and don’t give any brush marks.
Hi David,
Thanks for the great video. It gives me hope 😉
What kind of resin did you use on the vase? It’s so shiny!
I didn’t use any resin or varnish. Just the pouring medium was really glossy. You definitely should put a varnish on just to seal it and make sure the outside is hard and not sticky.
We have been doing pours as a family (all adults ) They have been an absolutely amazing experience. My husband and daughter are artistic anyhow. Their pieces are gorgeous. I am not at all artistically inclined and mine are pretty darn good too! It’s been a bonding and relationship strengthening activity in ways I never dreamed! Our question for you now is about pouring in glass. We have, through my husbands work the opportunity to get all kinds of free glass. It’s getting thrown out! Can you advise as to what kinds are better or worse?
There isn’t necessarily a bad type of glass. Getting something that can be used after it is poured on is the thing I look for when buying from thrift stores and the like.
I did an acrylic pour on a piece of thin glass and now wondering how i can attach it to the wall so that it is away from the wall a little. Any thoughts?
They have mirror clips you can mount to the wall (just like you’d do in a frameless bathroom mirror). That would probably be the cheapest and easiest. Search amazon for “B072JBDCMV” that will give you an idea of what you are looking for. There are lots of different types so don’t think that is the only one.
Thanks so much!
How do you know how much paint to use on a vase? I have just been guessing, and have been lucky enough to fess somewhat accurately so far, but I wondered if there was a formula to use.
Those are tricky in 3 dimension. If they are mostly cylindric you can the surface area of a cylinder calculation A=2πrh+2πr2 then divide by 25. I always make too much and pour over a canvas and do two paintings.
Can you have my email removed from this site please.
Absolutely I can Celia. There is a link at the bottom of the emails to remove yourself also.
Hi I’m totally new to acrylic painting, in fact the only painting I have done is putting emulsion on the walls in my home. I think I qualify to join the ‘stick figure’ school of art😊 I have a glass top garden table which I would love to transform with pouring acrylic. Any tips would be welcome.
For a table you’ll need to add a resin layer on top, or at least a few very thick coats of another varnish to give it some scratch resistance and durability. If is going to be outside that will be very important for the UV protection also.
If I want to paint the underside of a glass table do I have to do anything different than a pour on canvas? When I turn the right side of the table up I want to be able to see all the beauty!
You don’t have to do anything different. The bottom of a pour is MUCH different than the top so I would try and find a cheap glass plate or something from the thrift store to practice on so you see what you are going to get.
Hi! I just picked up acrylic pouring and I love it! I did try doing a pour on a upside down jar but the colors seemed to blend alot. Where did I go wrong?
When painting on a 3d object you need to use thicker paints. That is what normally is wrong on vases and things like christmas decorations etc.
Thanks so much! I also just finished reading your blog on muddy pours. Thanks!
Hi I have been enjoying your YouTube articles. I have a round outdoor patio table with a glass top that I would like to pour paint. Can you please give me step by step instructions with amounts of Acrylic paint, water and I thought I would use Elmers glue (If possible) . Thank you so much for all the help.
Florence
Are you painting the glass top or the table underneath?
You can definitely use glue. However, with the sun it will “fade” quicker than if you used a professional pouring medium although those are much more expensive. You could pour on it every couple of years as it fades though if that is more to your liking.
Can you list some producers of glass paints that you recommend? There are so many of them it’s hard to pick one.
I use the exact same acrylic paints that I use for my regular pours. Nothing specific to glass. Liquitex Basics, Artist’s Loft, Amsterdam, Artistic Creation, and Blick are all great student level acrylics.
When you pour a vase, how do you avoid that a lot of paint stays at the bottom of the vase? I watched your video several times and I can’t figure out what to do when you pour the last paint over the vase. I’m a newbee 🙈
I put mine in a cup that was upside down normally and then place that on a canvas or a clean sheat of plastic so I can use it for a 2nd painting or save it for a base coat later. The upside down cup lets it all drip off so it doesn’t pool at the buttom.
Cleaning the glass with alcohol will not make regular acrylic paint bond to the glass. It might stick, but it can easily be peeled off, along with the sealer that is on top of it. You can prep the glass with Liquitex Glass medium and bake it first, use specialized glass paint or use Golden’s GAC 200 as a pm which is designed for glass and other non-porous surfaces.
Thanks for the info.
Hey David, Im new to this & want to pour on a vase my daughter’s bridal flowers came in. I don’t want to chance that it’ll flake off so do you recommend I get the medium for glass (as mentioned above) or in your experience will cleaning the vase w/ alcohol be ok & it will not chip off? Tha ks!
There is potential for everything to chip. Adding a layer or resin or some other very hard finish after you do the pour is probably the safest thing along with a professional pouring medium.
I have been pouring on vases and jars while the colors look good by he me t finishes dripping all the oant is in vertical lines. I o dirty pours ring pours and while I am pouring they look great but by the time it dof the done dripping it’s vertical.
Not really a way to get around that with fluid art on a 3d object. The paint is always going to drip vertically.
Hey Dave, do use a primer on the glass to help the acrylic paint stick to the glass or do you pour the paint straight onto the glass without any primer? I’m a little confused as it seems it is recommended to first “prime” the glass before painting.
I have not used a primer in the past. Most mediums are VERY sticky and therefore not needed. However, if you use floetrol it isn’t sticky at all so you might want to prime first.
When I tried to remove a vase from cup after pour, (did not realize it was still wet after 36 hours) I smudged the paint in places, near the top. I’ve read that I can sand it and repour after it is completely dried. Would you know how to do this? I cannot find a video. Thank you.
I don’t allow links in comments becaue of spam but on my YouTube channel I have a video called “Can You Pour Over an Acrylic Pour – Pouring Over an Acrylic Pour” that you can search and see how to do that.