Canvas Showing Through Your Pour? 3 Quick Ways to Fix
One of the worst things that can happen to an acrylic pour artist is to pour an amazing painting only to find some blemish or imperfection after it settles for a few minutes. One of the more common issues I have heard about from new artists is spots of canvas showing through the paint.
Bare canvas spots showing through your acrylic pour are caused by the fluid paint being pushed away from the canvas by oils like silicone, dimethicone, or even natural oils from your skin.
While an acrylic pour with canvas showing through isn’t the end of the world, I have found there are a few things you can do to limit how often this happens with your paint pouring art.
Why do Oils in Acrylic Pours Cause Bare Spots?
Oil additives are used in acrylic pours to help cells form. These cells are created when the lighter and less dense oils rise through the layers of paints and pull some of the colors with them creating multicolor blobs on the surface of the painting.
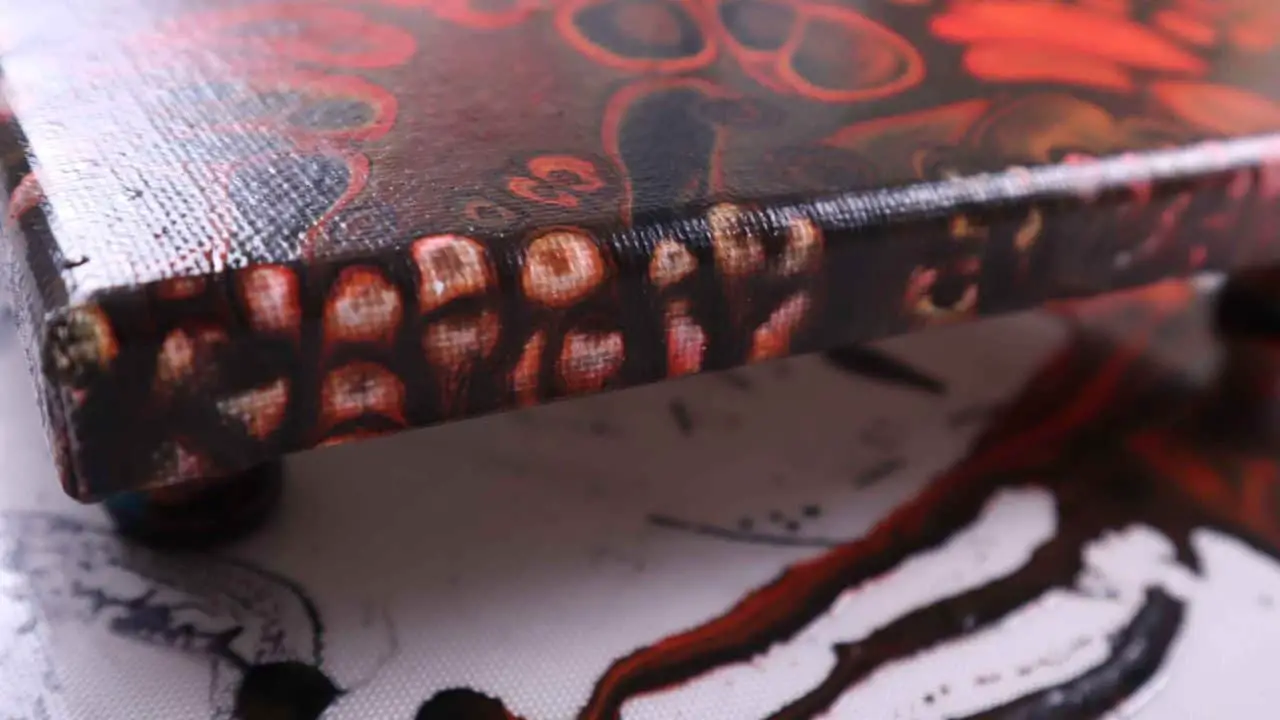
The problems start to happen on the outside of a pour where the paints are getting thinner as you have tilted off more paint. The oils gather on top of the puddles of paint. When you are tilting the paint flows over each other as you see in the picture below.
Ultimately the oil on top falls off the side of the puddle and meets the canvas before the paint does. The paint on top is then thinned as the paint is tilted off the canvas.
The oil that has touched the canvas sticks to the canvas and as the paint on top of it gets thinner it repels the paint away from the drop of oil. This causes there to be no paint on top of the oil and because the oil is transparent you see all the way down to the bare canvas.
These spots tend to happen more often on the outside edges of a pour because that is where the oil is most likely to tilt of the top of the paint puddle and because that is where the paint on top is going to be thinnest.
Easy Ways to Prevent Bare Canvas Spots on an Acrylic Pour
The simplest way to prevent bare canvas posts on your acrylic pour is to remove the ability for the additive oils to touch the bare canvas. If the oils never touch bare canvas first, they can’t repel the paint and create these spots.
Pre-paint Your Canvas so there is Always Color Underneath
The most straightforward way to prevent bare spots on your canvas is to pre-paint your canvas. This way if the oils do touch the canvas first it won’t be white bare canvas but already colored canvas that potentially shows through.
Normally I recommend you choose the base or main color of your painting to do this pre-painting with but if you want to add some pop on the outside edges of your painting you can also use your complementary color.
You can leave this painted layer wet or dry, but I have found that painting the color and letting it dry gives the most consistent results and prevents any of the white or gessoed canvas from showing through.
Use a Base Layer or Flow Extender to Prevent Bare Spots
If you don’t want to paint your canvas beforehand another easy trick is to use a base layer of wet paint or flow extender around the outside of your paint puddle.
This ensures you have paint all around your main puddle that has silicone or other oil additives in it. When you tilt your paint, you will be rolling over the base color or flow extender color instead of on to bare canvas.
I recommend that if you use either of these methods, you allocate between 30% and 60% of your total paint as your base paint or flow extender. The more of this paint you use the less you are going to distort the main design of your painting.
This happens because the main puddle of paint does not roll over itself and hide the outside edges of your puddle as it is slipping across the base paint or flow extender instead.
Thicker Paints do not get Repelled as Much by Oils
Another thing to note is thicker acrylic pour paint does not get pushed as easily as thinner pour paint. That means you are less likely to get bare spots along the outside few inches of your painting as you would with thinner paint.
The sides and corners are always going to potentially be a problem even with thicker paints because gravity is always pulling your paint downward and thicker paint just won’t have enough bonding strength with the side to stay thick.
Oils from Your Hands Can Cause Paint not to Stick to a Canvas
The last thing isn’t as obvious as the others because most people don’t realize how much oil your skin naturally produces.
These oils, while essential for good skin hygiene, can also cause the same problem with paint not sticking to your canvas, albeit usually at a much smaller scale.
The easiest solution is to wash and dry your hands before handling a bare canvas or using latex or other sterile gloves.
Keep Stored Canvases Dirt and Dust Free
The last thing to consider when getting bare spots on your acrylic pour canvas is to eliminate the potential for dirt and other contaminants from coming in contact with your painting surface.
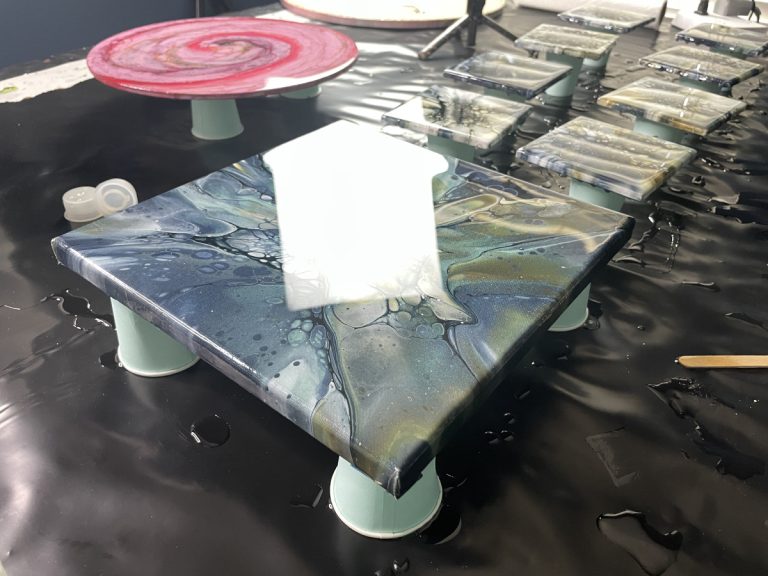
I try to keep my canvas stored in an elevated place, so they don’t gather dirt and grime from the floor or me walking past them.
Put them in a place where you aren’t handing them often, so they remain and clean as possible.
Also, don’t remove the protective plastic packaging to ensure they remain clean and dirt-free for as long as possible.
Michael’s craft store bundles of canvases come with every other canvas being fully wrapped in plastic. I try to make sure a wrapped canvas is always on the top of the pile so any dust that drops lands on this protective barrier first.
A simple sheet or other easily removable covering can also act as the first line of defense for dust and air pollutants.
Gesso Canvases that are Dirty or Being Reused
If you can’t ensure your canvases remain clean one option is to always gesso before pouring so you know you have a clean base layer to start from. Gesso is more forgiving of dirt and oils than acrylic paint is and will help you to get uniform coverage on your acrylic pour.
When reusing a canvas that already has a shiny layer of paint or that has been varnished, a coat of gesso will help the second layer of paint adhere more readily to the surface.
When reusing a canvas, I always recommend cleaning the canvas with slightly soapy water to remove all dust and oils that might have accumulated.
Having trouble getting cells with silicone? This post on Acrylic Pour Cells gives you all the info you need to get amazing multi-color cells with your acrylic pour.
Canvas Showing Through an Acrylic Pour is Not Bad
Keep in mind that acrylic pouring is the creation of unique and personal artwork. Sometimes as artists, we think that everything should be perfect.
Mass-manufactured art is perfect. In my opinion, handmade acrylic pour painting pieces are unique because of their imperfections.
Don’t be too hard on yourself that you are seeing bare canvas spots on your art. It happens to us all and some of those spots I have left because they add to the unique quality of the painting.


How can I fix a painting that silicone left behind isn’t letting epoxy coating to stick. Just a few spots but really need to save this. I know of I re-epoxy without cleaning will do the same
Wash with Windex. Then a damp (not dripping) cloth with dish soap. Then with a makeup remover wipe.
Give special attention to anywhere the first coat of resin didn’t stick.
Thank you for this post. What I really struggle with is the base layer (pillow coat?) popping up when I don’t want it to. I got some Artist’s Loft soft bodied acrylic in white because it was less expensive. I’ve mixed one to one because I found it was already thin. I mixed it with a 60/40 mix of Glue All and water. I find that it’s popping to the top around the edges when I use it to surround a cup pour. My thinking is that it’s getting pushed to the edges by my pour and not dropping over the edge and because it is thinner it’s popping through the colors. Do I have the right idea? What if I try it without mixing it with anything? There are times when I want the white or whatever pillow coat to pop through, like when I do a spiral pour with a nice shiny gold for a pillow coat. Those bubbles give it a nice contrast, but not the white around the edges of a flip cup or kiss pour or… Thanks in advance for your advice!
I don’t know, but maybe artist loft is not the best flow extender for those type pours? or perhaps mixing with pouring medium instead of glue/water? Anyone?
This can happen to any medium when using silicone. That is the nature of silicone.
Your information is always so helpful. I love how you fully explain the cause of the problem.
Thanks, Jane
My pleasure Jane. Thank for visiting.
I watched several of your videos and Dutch poured 5 16 x 20 canvases for my bedroom . I learned a lot … it was my first time…they came out very well. Thanks for all the good info.
That is awesome to hear Kathy. Took me half a dozen before I got one that I liked.
I’m a beginner and you have already taught me so much! Need help–I have had 2 pieces that I loved when they were still wet. Next morning, they are dry and there are areas of “rivulets” for lack of a better word. If you look at it from the side, a few of the bands of color have separated, leaving valleys. They are not there until hours later. What am I doing to make this happen, and is there a way to fix after it’s dried?
So those are cracks or crazes. It happens because of a number of reason. Cheap white is the main cause I have found. Paint this is left too thick is second. A draft or heat blowing on the painting so the surface dries faster than underneath and when underneath it cracks. Search my website for “cracking”. You’ll find my article about this too with more explanation.
Hello! I’m a beginner and you have already taught me so much! Need help–I have had 2 pieces that I loved when they were still wet. Next morning, they are dry and there are areas of “rivulets” for lack of a better word. If you look at it from the side, a few of the bands of color have separated, leaving valleys. They are not there until hours later. What am I doing to make this happen, and is there a way to fix after it’s dried?
Duplicate but I answered the previous one. Good luck Sue.
Hey David, I love watching your pours. I want to start but I don’t know a bout the “pillow layer”
Is there a specific video on that?
Thank You
My video about acrylic pouring terminology talks about that. FYI Pillow is only used in 1 technique. Sheleeart blooms. No other technique really uses this so don’t get confused by that.
Hi David. I’m a beginner and did a Dutch Pour. I love it. However, there’s a few spots where the base coat is slightly thinner in the negative space area. The painting is now dry. Can it be corrected without making it obvious? Thanks for your videos. I have learned a lot from you.
You can add more paint and let it dry, however, that is going to bother you 1000x more than anyone that you give or sell your art to. Those are the things that make our artwork authentic and shows they were hand made. Those used to bother me but unless you can see the canvas I don’t worry about them anymore.
David, thanks for sharing your time and talent ! I am new to acrylic pouring. I bought the cheap craft paints to learn from. I use Flotrol to mix with them. I have tried to create cells and lacing but have had little success. Is the craft paint the culprit?
No. Craft paint will work with floetrol. What % of craft paint to Floetrol? And then how much water are you putting in? Generally no cells is because the paint is too thick or way too thin.
Thank you for your videos! I am new to this and love it! I did my first pour 2. Lights ago and it was not good at all. Then I found your viedoes yesterday and binge watched and rewatched and tried again last night. I loooove them ! This morning though, I can see the texture of the canvas through them-i couldn’t last night. Did I miss a step or something?
Nope. The paint dries super thin. Honestly that will bother you but no one else. Just shows you made an authentic painting on canvas.
Eureka! You have a way of explaining things better than the dozens of other artists I’ve watched on YouTube or Pinterest! Thank you so much! Now I know the remedy for what I’ve been doing wrong, and can’t wait to do it correctly.
Thanks again Guru. Any advice on loosing weight?
Lol, I wish.
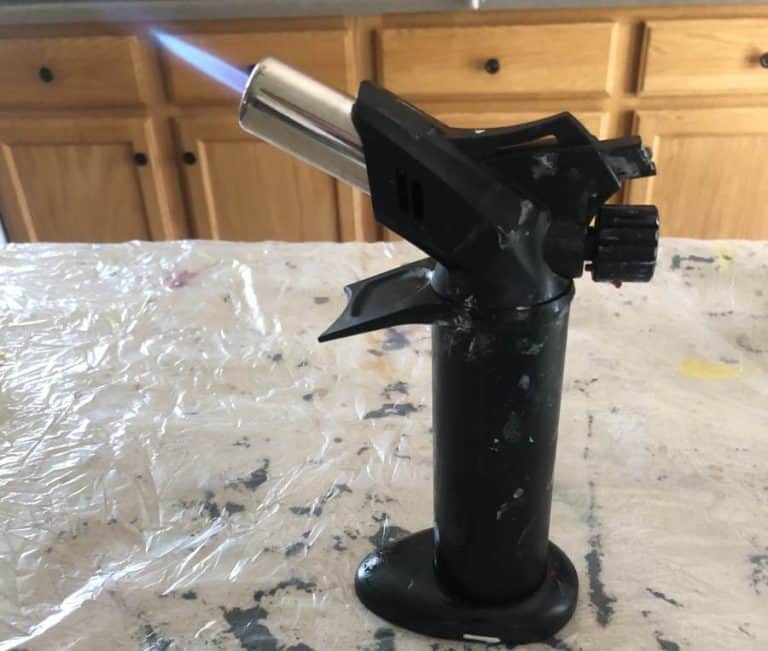
I used craft paint and had to mix 4 parts paint to 1 part Australian Floetrol to get a good consistency. It didn’t create any cells. The next time I added a drop of silicone into each colour and got nice small cells, especially after a good torching.
Interesting. I usually don’t dilute craft paint that much as it doesn’t have enough pigment and really dulls out the colors. Glad you were able to improvise and get some cells at the end.
I am a beginner what is the ideal ratio for a mix of PVA glue, water and acrylic, and does the base paint on the canvas need to be of the same ratio or slightly thicker.
The ration depends on the quality of acrylic paint. I usually first mix my blue with water. 70/30 or 60/40 depending on how thick the glue is (glue/water). Then I mix that 1:1 (Medium:Paint) with craft paints, 2:1 with student level acrylic and 3+:1 with artist level acrylic paints. Then add water to get my ideal consistency.
Base paints are normally exactly the same makeup and consistency. THere are some exception to that like pearl cells or the Sheleeart Bloom technique.
Hi David, I have been painting for some time now, and I have gotten some really nice paintings. These last 3 months I am having trouble with cracking and flocculation. I have done everything that I can think of or read about, to not even running my fan in the area when the paint is drying. My temperature stays on 76 year-round. I am wondering if I am using too much of the glitter paints or perhaps the base paint has been changed. I use the PPG paint from Home Depot. I use both the Behr 7300 and Behr 8300 for my pouring medium plus polyacrylics. I am at a loss as to what I could be doing wrong. Any suggestion would be greatly appreciated.
What type of pour are you doing? That isn’t a normal paint combination for acrylic pouring. Normallly I’d only see that in the Sheleeart blooms. Also, when you say glitter paints can you give me an example of the name and brand of the paint?
I will try not to take up too much of your busy time. As many say, they wish they had seen you early on. If they gave college credits for hours watched on Acrylic Pouring, I could be a professor at Harvard. Much confusion for me. I do the Shelee Art bloom technique and swiping. (I can’t take her course because I am not proficient on the computer) I use PPG multi-pro, semi-gloss from Home Depot for the base; Behr deep base 7300 or 8300 plus Varathane triple thick or Minwax polyacrylic on a 3 to 1 for my pouring medium, mixed about 3 to 1 in my paints. My tube paints; Amsterdam, Golden, Liquitex, Arteza, Windsor Newton and Grumbacher. Pigments (glitter, sorry about that) are Colourarte and Eye Candy. I do use some Liquitex PM or Josonja to start with the pigments and also to thin paints. Aussie Floetrol for my CA. I have done the homework, painted over 200- 8X10 (Dollar Tree Canvases, pocket book to prove it) then onto bigger ones so I know it works, but not here lately. Weather here in Texas has been terribly hot, at times 118 degrees so I even wondered if that could be the cause, even though I have air conditioning.
Advice greatly appreciated.
Hi David.
Prior to stumbling across a couple of YouTube videos showing the art of acrylic pouring, my artistic creativity had slipped into a dark cave for some long term hibernation.
Today, a new light is starting to shine because after clicking on a few live links I found your “LeftBrainArtist” pages and videos, you have managed to get the pieces of my new jigsaw to start coming together, thank you.
You have already answered many questions without me even knowing what my questions would have been.
I feel I am about to enter a very steep learning curve with so much to learn and I will be asking myself many questions.
Thank you for putting yourself out there to explain and show the little things that can help so much.
Cheers from Australia.
Graeme
So excited to see what you create Graeme. I never ever though I could be an “aritst” but pouring has changed that for me. I just can’t get enough.
Hi David
I am very new to this type of art but very excited. Thank you for your videos. I am using the Artist Loft canvas (didn’t want to break the budget) but notice that they can be floppy like, rather than tight. Some sites say use gesso, sand it and do another. Some say lightly mist the back with water and blow dry. Are there other suggestions. I see yours and others beautiful work and desire to learn what works best, rather than the garbage can. Thank you for helping all of us budding artists.
I usually mist and blow dry to tighten up the canvas. They won’t tighten super well and might crinkle slightly in the corners but that is just a symptom of their quality.