The 3 Best Torches for Acrylic Paint Pouring
Acrylic paint pouring is an oddity in the painting world because fluid pour artists use tons of different doohickeys from sink strainers to jumbo thumbtacks. And because you are reading this article, you have probably gotten the point in your acrylic paint pouring journey where you need to get your first torch, or you need to replace your existing one.
Our top three best torches for acrylic paint pouring artists are as follows:
- SMALL AND CHEAP – Sondiko Butane Torch (Find on Amazon)
- LARGE SCREW ON – Butane Torch by FunOwlet (Find on Amazon)
- MINI HOT AIR GUN – ZeopoCase Mini Hot Air Gun (Find on Amazon)
For more information on each of these torches and our reasons for choosing them as the best, keep reading. We will also be covering all the things you need to think about when choosing a torch, what works and what doesn’t, and a provide you with a few of the lessons we have learned over the years of paint pouring.
If you want to skip to our recommendations for the best torch for acrylic pour painting, click HERE.
Why Use a Torch for Acrylic Pouring?
There are a few reasons why you might need a torch for acrylic pouring. A more robust answer to this question can also be here in our article Why Do You Torch Acrylic Pours?
Pop Air Bubbles
The first, and probably most important reason, is to pop any bubbles that form. The nature of mixing paints in a liquid form and pouring them onto a surface creates situations where air gets trapped in the paint.
Many air bubbles will pop naturally as the paint dries. Some of them, however, will not and this will lead to small pinholes appearing in your painting. These will accumulate dust and debris over and in our opinion are not very attractive.
Create Cells
Another major reason to use a heating device is the break the surface tension of the paint and allow cells to form more readily. Cells are created when the different colors of paint rise and drop based on their individual weight and densities.
For a more in-depth explanation about cells in acrylic paint ours please refer to our article Acrylic Pour Cells: Everything You Need to Know.
If you are getting spots where you canvas shows through on your acrylic pour here are 3 Ways to Prevent Bare Spots on Your Acrylic Pour.
Different Types of Torches
You have a few different choices when it comes to heating sources for acrylic paint pouring including a butane torch, a stick torch, and a hot air gun. Each one has its benefits and drawbacks.
Butane Torch
The butane torch is by far the most common of the heating devices we see for fluid acrylic pouring. These are hand-held, easy to use, and relatively inexpensive to buy and maintain.
When using a torch for art, there are a few features that you want to look out for to get the most bang for your buck.
- Gas Type – The most common gate type for crafting torches is butane. Butane is less toxic than propane and is more efficient. Not to mention burning butane only produces carbon dioxide instead of the more harmful carbon monoxide like propane.
- Igniter – This is the button that creates the spark to ignite the flame. This button should be easy to push but not too easy that it can accidentally ignite. Most of these buttons are the back of the device convenient to where your thumb would be.
- Flame Intensity – The higher-end torches allow you to select the level of the flame intensity (weak or strong). This is convenient when working on different size projects. Acrylic paint can scorch so don’t get any size of flame too close or leave it for too long.
- Handle – The handle is where you hold the torch. Most handles are small cylinders that have a butane tank inside. This should fit well in your hand, have enough grip to keep it secure, and feel comfortable. Having the other features conveniently located for one-hand use is also a plus.
- Stand – When you aren’t using your torch, we recommend you keep it upright so there is no chance of any gas leakage. A stand or a platform at the bottom of the torch handle is convenient for this purpose.
- Flame Area – Similar to the flame intensity, the area that the flame covers is very important. The valve on the end of the torch determines how much flame is produced along with the intensity level guide. Larger openings all the torches to cover more surface area and heat up the paint more quickly. This is very convenient for larger paintings.
- Safety – Almost all torches come with a safety switch that must be pressed or pushed before the gas can be released. This is the number one feature I would for in a torch. No one wants rogue gas or flame in their home or studio.
- Refill Ability – The last consideration is if the torch is refillable or not. Most torches can be refilled by turning the torch upside down and inserting a refill container into the opening at the bottom. Additional instructions on refilling should be provided with the torch.
When selecting your butane torch, you will want to check on how the torch works in each of these categories. A torch without a safety shouldn’t be considered while one with a flame intensity lever may or may not be a requirement.
Stick Torch
A stick torch is a handheld flame device commonly used to start a grill, fireplace, or candle. These are generally not refillable. These can be used in a pinch to pop bubbles but because the flame is so small and not very intense, they don’t work very well for acrylic pouring applications otherwise.
Hot Air Gun
Over the last few weeks, we have seen several acrylic pour artists on YouTube take up the use of a hot air gun for their fluid pour projects. You can definitely use a heat gun instead of a torch for acrylic pouring.
These hot air guns are normally used to heat up surfaces quickly and efficiently. Here are a few of the features to look for with a hot air device.
- Power – Many hot air guns come with a
setting to choose the power, temperature, or wattage. This setting allows the user to change the
amount of heat being produced by regulating the power/wattage. For acrylic pour artists, you do not want
very much heat so a low setting like 300watts or 150 – 200’ Fahrenheit. - Recommended Use Time – Many hot air guns
have a limit to how long you should use them at any one time to make sure the
tip and the heating elements don’t get too hot.
Luckily for us pouring artists, we don’t usually use the heating devices
for more than a few minutes. - Blower Intensity – Some of the high-end guns
allow you to control how hard the air is blowing through the heating
device. This is very beneficial for
paint pouring as we generally don’t want to push our paint around, only pop the
bubbles and promote cell formations. - On/Off Switch – Kind of a no brainer here
but having an on/off button instead of needing to plug and unplug the device is
almost a must.
Our recommendation is to find a heat gun that is low power, at least for a heating device, and that doesn’t blow too hard. We don’t want the blowing to move our paint. We really want it to help heat up the surface of the paint and to allow the oils and less dense paints to rise to the top and create cells.
Top Recommended Torches
We have broken our recommendations down into three categories; Small and Cheap, Large Screw On, and Mini Hot Air Gun.
Small and Cheap
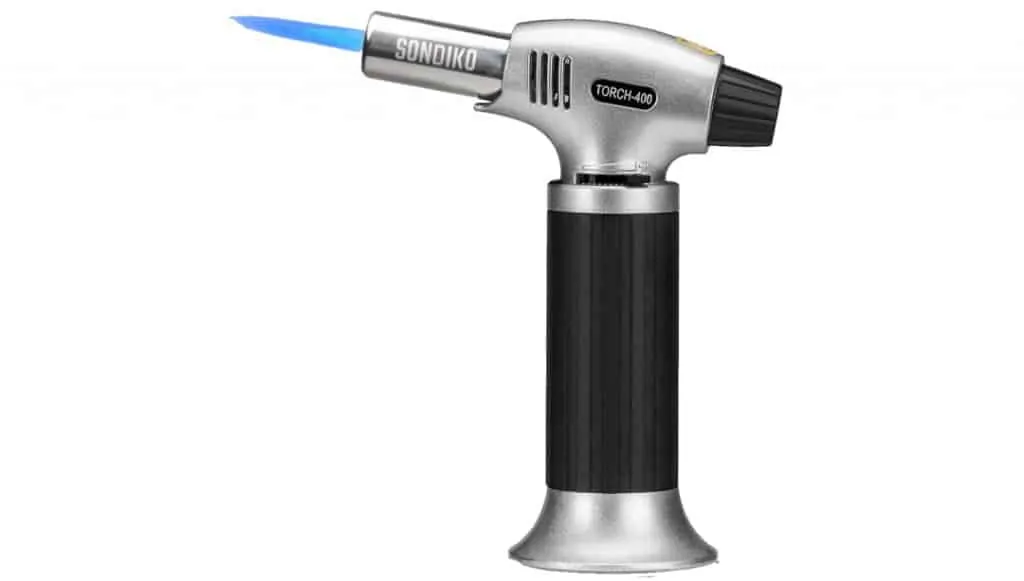
This category is dedicated to those artists that want a simple and small torch. The Sondiko Butane Torch is a great option for the beginning acrylic paint pour artist. It is a comfortable hand size, has most of the features we mentioned above, and gets great reviews on Amazon.
Large Screw On
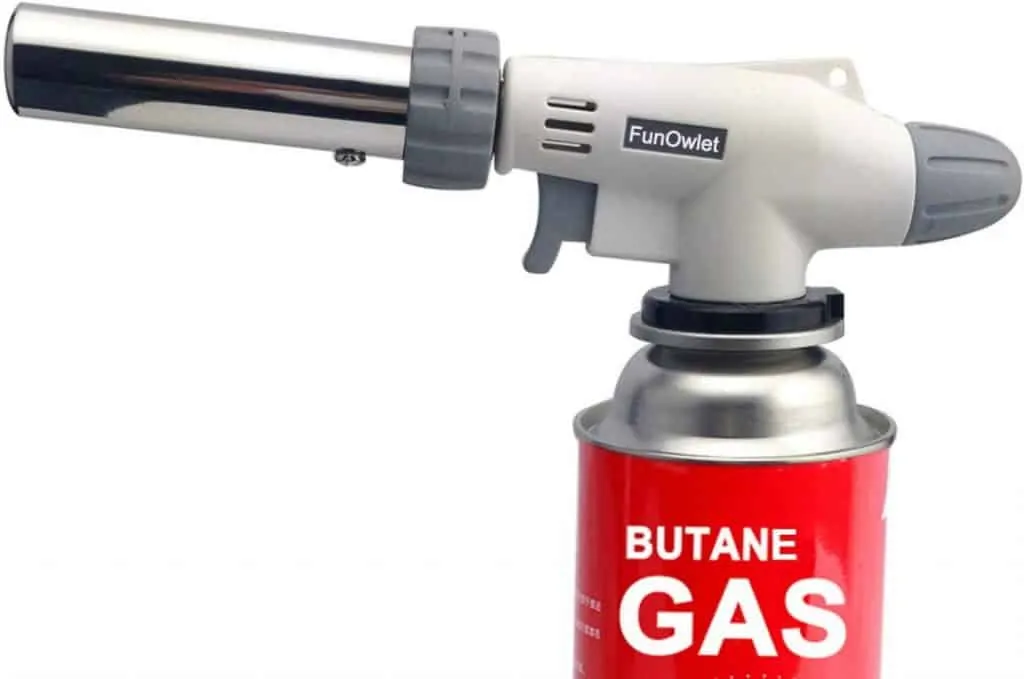
For those of you looking for a little more flame or who work on bigger painting surfaces you’ll want a larger head on your torch. The best torch for acrylic pour painting on larger surfaces is the Butane Torch by FunOwlet.
Rather than refilling the torch from a canister, this torch screws directly on to the canister of butane. In addition, the torch heat is much larger and can heat a much greater surface area which can be a real time saver.
Mini Hot Air Gun
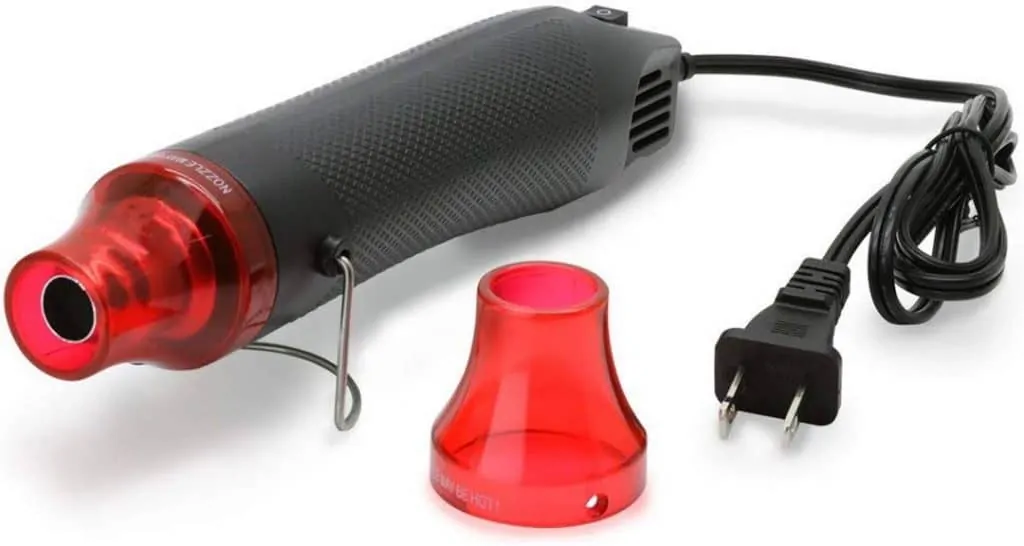
The last of our torches for acrylic pouring isn’t really a torch. The ZeopoCase Mini Hot Air Gun is a small hand-held hot air gun, otherwise known as a heat pen, that has just the right amount of heat and air flow for fluid acrylic art.
This hot air device is generally used for embossing or to heat shrink wrap. It also comes with a 100% 12-month money-back guarantee so if you don’t like it, you are only out a little bit of your time. The one downside is it only has a 36” cable. For those of you that need a little longer chord to work with try the Abunro Heating Tool with its 6’6” cable.
Problems with Torches
Over the last few years of paint pouring, we’ve had a few problems with the torches that we’ve used. The main problems that we had were with reliability and button functions.
Moving Parts
With continued use, the most likely piece to break on any torch are those that move. The intensity level, striker, and the safety get used the most. Most torches, at least the ones that cost less than $50, will have plastic parts that will wear out over time.
For someone painting a few times a week, a torch will generally last two or three years. That is just the normal lifespan of most plastic pieces. Paying less than $20 every few years for such a useful tool really isn’t bad.
The benefit of buying a new torch every few years is that you can also upgrade the type and fit based on the experience you had with the previous torch.
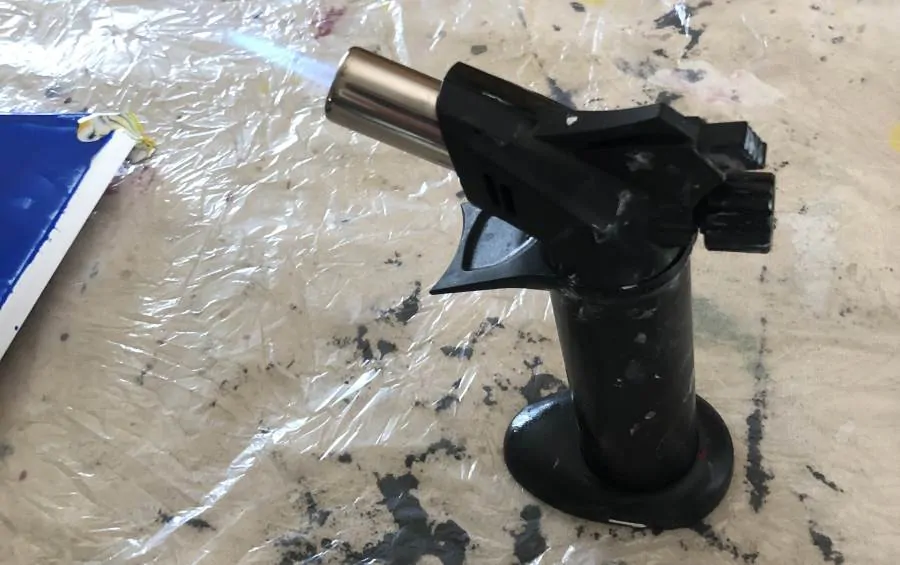
Dirty Torch
Our latest torch died because we were doing a resin topcoat on our pour and forgot to take off our gloves before torching. The resin got onto the safety and strength dial and sealed them both shut.
If we would have had a model that allowed us to turn it on and then just hold the tool, this would not have been a problem.
We have had to clean our torch a few times from paint that accumulates on it over time. We usually just use an alcohol wipe or swab to clean up as much as possible and then go over it again with a scrubby brush and hot soapy water. Do not submerge the torch in water as it can get water in the gas tank and ruin it!
Torch Safety
The last thing we want to you to consider when working with a butane torch or heat gun is on your safety. Anytime you are using a product that creates heat or flame, we recommend you take some simple safety precautions.
- Follow the directions of the product. Using your torch in the recommended manner will limit the potential for unfortunate events to happen.
- Keep a fire extinguisher close by – A personal fire extinguisher like Fire Gone is an essential part of any art studio where flammable materials are used.
- Let people know when you are using a torch – Just like with the buddy system, having someone else away or potential disasters can help keep them contained if they ever happen.
- Use common sense – We really shouldn’t have to say this, but it is worth a mention. Always think about what you are doing, especially when using an open flame or high heat device.
Conclusion
Every acrylic pour artist needs a way to pop bubbles and help the formation of cells in their work. Whether you chose to use a butane torch, a heat stick, or a simple fire starter flame, do so with caution and care.
We hope this article on the best torch for acrylic pouring was helpful. If you have additional questions or comments please ask below and we’ll get to them as soon as we can.

Great advise. I am a senior in my late 70,s, living in an apartment and going to attempt my first pour. Would you have any advise on how to finish my painting, what to use and must have no fumes.
Honestly, I can’t think of one that has absolutely no fumes. Water based polycrylic is probably the best finish I’ve used that has very little fumes. You could also opt to put a little GAC 800 or Liquitex Professional pouring medium into your paint and then NOT finish them as those will give them a nice sheen luster.
Any suggestions on what to do about the tiny air bubble pinholes if you don’t manage to pop them all before a piece dries? Will something like Liquitex varnish fill them in later?
Yes, any varnish will cover those up. Even spray varnish will.
Thank you! This was quite helpful as I am going to purchase what I need to give paint pouring a try. I’m 70, a nurse, working part-time and discovering how much I enjoy messing with acrylics! We all need something to look forward to doing everyday…..& this is my new fun thing to do & relaxing too!
Have a wonderful weekend!
That is the best thing I’ve heard this week. “We all need something to look forward to doing everyday”. I needed to hear that. Thanks Linda.
Hi, I wanted ask If I can use a normal electric fan (for hair) …will it work?
Kind of. The air movement from the hair drying will pop bubbles and is an acceptable if less capable alternative as it will also move the paint if you get too close. I think the heat works better to break surface tension and pop bubbles plus it helps the thinner paints and oils to rise up.
Hair dryer you mean?!
Did I say it wrong somewhere?
Great advice. At 78, and artist all my life, it’s time to branch out to something that is as stunning as pouring. Before I buy, can you advise on paints? Cheap? Craft acrylics like FolkArt acrylic – even from a dollar store? Tubes vs bottles? Etc. Thanks for your help
I prefer student level acrylics Gail (Liquitex Basics, Artist’s Loft Level 1, Arteza, Blicrylic, etc). Craft will work but the pigment load is so low that ultimately it costs more to use craft paints in actual materials and disappointment in the quality of your art.
Just started doing the pouring … love it .with my very first pour got lot of support , people loved them . keep thinking about next idea I want to pour . All these comments were really helpful
Thanks Nagina. Remember there are some people that haven’t taken the plunge yet and started. That means you have useful experience to others that are still a step behind you and you should give feedback when you see you can help others.
I BOUGHT ARTIST TOUCH AND HAVE NEVER USED ONE BEFORE ON BOTTOM IS A PLASTIC CIRCULAR HANDLE YOU PULL OUT YOU CAN TURN IT IN OR OUT; WHAT IS THIS FOR
I am not sure what you mean. Can you send me a picture of the product and the item? You can use the contact us form in the menu to do so.
My daughter brought me a butane torch, very thoughtful of her. I never used one before and was wondering if I should return it and get something a little safer. I live in an apartment building not an opened space like garage I’m very responsible but also a little nervous should I be concerned.
I prefer my little kitchen torch (for creme brule etc) Everything turns off when my hand leaves the torch. Just depends on your comfort level.
Is the air heat gun good for pulling cells?
Also for cel reaction is there a big difference in using the real deal of Flotrel or the cheaper version using the mix of Elmer’s Glue and Water. I love the lacing and large cels.
Glue will not create cell by itself with a swipe or a silicone. Floetrol will generally create small cells. A heat gun distributes more heat than a torch so you get a broader section of cells popping up. Torches are hotter and are consolidate so you get quicker cells but in a smaller area.
Just about to try my first pour. Scared and excited at the same time. I love the comments suggestions. I have a heat stick for embossing and will try it. Bought inexpensive craft paint ( Folk Art) to get the feel. But will move up in quality if all goes well level surface seems critical. What’s the best way to achieve that. Am now an avid follower
I use push pins. If you have a lot of unevenness you can put J hooks in all four corners and then just screw up upwards or downwards to make the surface leve.
Hi there
I am struggling with what to use to finish my paint pour. Please let me know what is the best finish to use. I’m in Australia.
Thanking you in advance.
I use Liquitex varnish currently.
Hi! These are such great tips!! Would the liquitex varnish take the place of finishing the piece with resin?
No. I would always varnish regardless. If nothing else it gives a UV barrier before light can hit any of the acrylic paint underneath and it fills in small cavities you might have to protect from dust and debris accumulation.
Wonderful answers and suggestions. As an artist only using oils and acrylics on canvas or wood, I now feel the need to step back from tradition and experiment with enjoyment.
I am so glad to have found your site.
Pouring is so fun to do Denise. I kind of envy you that you can be successful with oils and acrylics in the traditional side. Even with some practice I am horrible which is why I took up pouring.
An artist most of my life at 77 I’ve been unable to continue due to Essential Tremor. I believe Acrylic pour may be a way of creating art once again. Looking forward to my first pour. Do you think a thicker consistency would help with my slower movements when tilting?
Your videos and website are inspiring even if I won’t be able to manage the pours.
I don’t think slow with tilting will be a problem with either thick or thin pouring. So glad you’ve found an artform you can continue your creativity with.
Is something added to the acrylic paint to keep it from becoming one color?
No. The viscosity or consistency of the paint helps the paint not intermix too much. Thicker mixes less and thinner more. The pouring medium and the quality of paint affect that a bit too but not as much as the consistency.
Hello, I hear alot about adding water to the paint to make it thinner. Is thinner better or thicker for the pour, im going 6to buy already mixed pouring paints but i am concerned about cracking. This ill be my first pour. Also will swiping bring out the cells
You don’t add any water to already mixed pouring paints. You use them as is. You only add water if you are using tradtional acrylic paints + a pouring medium + water to get consistency.