Why do you Torch Acrylic Pours?
Lots of artists, including myself, have come to realization that using a heat source on paintings during and after a pour can create some really beautiful effects. Being a very analytical left brained person, I’ve always wanted to really understand why. So I did a little research and thought I’d share.
Why do you use a torch on acrylic pours? The use of a heat source on the surface of an acrylic pour helps break the surface tension of the top layer of paint. This allows lighter weight colors rise through the heavier colors and it helps close air pockets and bubbles that may form. Heat also allows the paint to flow more rapidly.
I’ll dive a little deeper into the mechanics of why these things happen when you torch your painting. I think you’ll learn that understanding more of the “why” behind torching will make your painting prowess grow.
What is Surface Tension
Surface tension is the special bonds that are created between molecules that are not completely surrounded by other like molecules. Because these molecules don’t have friends near them on one of their faces, usually above them, they tend to stick to the molecules on their sides and bottom with more energy than normal.
When this happens across the entire surface of a liquid, like water, it forms an invisible shield or barrier over the liquid. Something with enough energy, like a stone dropped into a pond, will break this bond and sink through this shielded layer. However, something small like a water skeeter bug, will “float” on top of this layer. This is made possible by the surface tension of the water.
When talking about surface tension in acrylic pour paintings, this is referencing to the special connection that the paint molecules have right on the top layer of paint. When you pour paint onto a surface or into a container, the top layer forms this barrier.
With pour acrylics, this surface tension can readily observed when preparing a dirty pour cup. If you pour small amounts of paint very slowly into the cup, the new paint sits on top of the paint already in the cup. The new paint doesn’t have enough energy to break the surface tension barrier, and therefore sits on top of the previous layers. If you pour aggressively into a dirty pour cup, the paint immediately breaks the surface tension and dives through top layer of paint.
If the paint is pour in quantity, but not aggressively, it also breaks the top layer’s surface tension and dives below the surface. Sometimes, this paint then rises to the top layer from below but doesn’t quite break through the surface tension again coming up from the bottom. When this happens, if the paint on top is more opaque, you can see the new paint just below the surface through this barrier created by surface tension.
How does Heat Affect Surface Tension?
When heat is applied to liquid paint, the molecules in the paint gain energy and start to move more rapidly. This additional movement of the molecules in a liquid makes that liquid flow more readily.
When cooking, you see this phenomenon quite frequently with heated oils. When you first pour oil in a sauce pain it is generally thick. As the oil heats, it starts to flow easier and becomes more like water in it’s consistency.
So why does heat affect the surface tension of paint? Remember that surface tension is a special bond between molecules on the top layer. When heat is added, that bond because less strong because the molecules have more energy and want to move around more, not stick in place with their neighbors. In addition, heated paint flows better because of the increased energy between the molecules.
Types of Heat Sources for Acrylic Pouring
There are multiple different methods to add heat to your acrylic pour. The first method is to adjust heat of the room where you are painting. By increasing the temperature in your studio area, you can help the paint to flow more readily and decrease surface tension.
Conversely, you can cool the room to keep the paint from flowing as fast. This may also help our pour acrylics from mixing too much on your paint surface, which sometimes causes muddied colors to form.
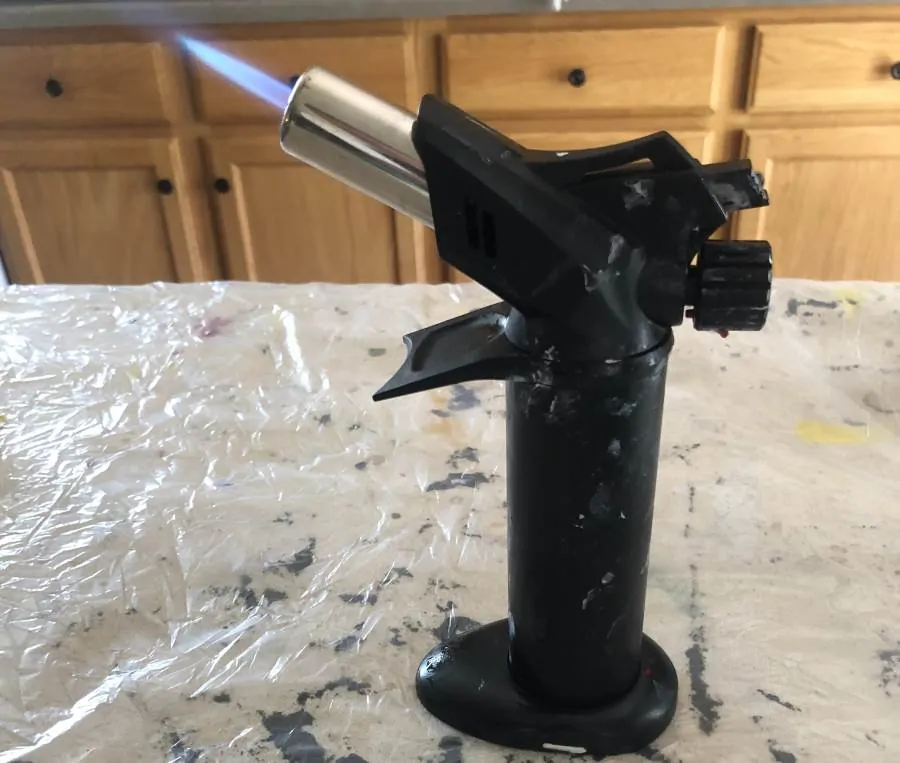
Butane Torch
Butane torches are the most common way that acrylic pour artists add heat to their paintings. Because of their relatively low cost and cheap and easy refilling, these tend to be the first choice for acrylic pours.
To save money when purchasing a butane torch, try searching for a kitchen torch instead of a craft torch. You will probably see a considerable price difference between the two even though they essentially the same thing.
You can see the torch that we used to recommend on Amazon here or look at our article on The 3 Best Torches for Acrylic Paint Pouring.
Heat Gun
Heat guns, which are specialized blow dryers with more heat and less airflow, also lend themselves well to acrylic pouring applications. Keep in mind these will move the paint on the painting surface more than a butane torch will.
We don’t currently use a heat gun but we’ve had our eye on this one that you can get on Amazon.
Use Caution when Using Heat on Acrylic Pours
Here are a few recommendations for keeping you and those around you save while using heat application on acrylic pour paintings.
- Keep others away from your painting area.
- Do not use an open flame near flammable materials.
- Use short applications of heat.
- Lower the heat output if your heating device.
- Keep a fire retardant nearby. A bowl of sand or a pitcher of water would work as a retarder.
- Use indirect heat. Point your torch or heat gun to the side instead of directly at the painting.
- Be very careful using heat when alcohol or other flammable materials are used as mediums or additives.
How Surface Tension and the Weight of Paint Work Together
Now that you understand how heat can affect surface tension, why do you think heat is used to help create cells? The reason for this lies in the difference in the weight of paint mixtures.
When a heavy material comes in contact with a lighter material, the heavier will, in most cases, sink. The lighter material will tend to force it’s way upward as the heavy material go down.
This is no different with acrylic pours. Heaver paints will generally fall the bottom of the cup they are in or the painting surface they are on, while lighter ones will give way to the heavier paint and move upwards.
Surface tension can inhibit this movement. Especially when paint weights are not obviously different, as is the case with most actual acrylic paints used in paint pouring.
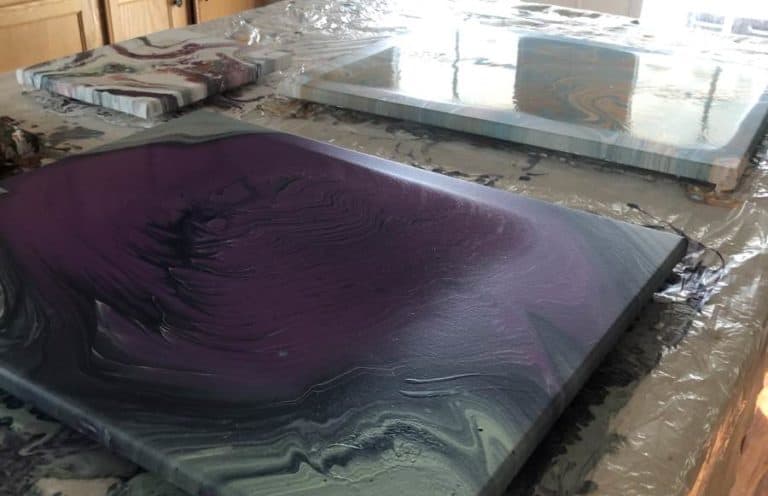
If a lighter paint is trying to move up through a heavier paint, but the surface tension is resisting this movement you don’t get cells to form. However, when we torch the heavier paints on top, this allows them to move more readily and lowers the surface tension. When this tension loss is enough, the lighter paint can emerge through the top layer.
Breaking the surface tension and letting different color paints rise through the surface layer colors is how many cells are formed in acrylic pouring.
Visit our article on Acrylic Pour Cells to find additional information on how cells form and tips and tricks on how to create them.
How to Reduce Surface Tension without Heat
Heat and paint weight are not the only things that can affect surface tension. Here are a few suggestions that can influence surface tension.
- Thin your paint – Thinner paint has more energy and therefor lowers surface tension. Be careful not to thin to much as this will cause the paint to mix more and give muddied colors.
- Add Flow Aid or Flow Enhancer – These additives, also know as surfactants, help reduce friction between paint molecules so they can “flow” better.
- Add Isopropyl Alcohol – Use small amounts of rubbing alcohol in your paint mixture. This will also thin the paint and acts as a friction reducer. Dripping small amounts of alcohol directly onto your painting can work for more localized effect also.
Related Questions
Do you need a torch for acrylic pouring? You do not need a torch to create acrylic pouring art. Torching is a helpful technique that can add some variety to your work. Creating cells is made easier by combining a heat source, like torch, with reducing surface tension and increasing the vertical flow of paint.
Can I use a kitchen torch for acrylic pouring? The name “kitchen torch” is only used to help identify a torch with the cooking community. In reality, these torches are generally just regular butane torches that have application in many different hobbies and professions.


I love Ur site. Can I just ask, when u advise to lay down a base coat b4 pouring, should this be wet or dry when the pour is being done? Cheers. Julie
You dont need a basecoat, but a wet basecoat allowes the paint to move better across the canvas.
#truth Thanks for the clarification.
Superb explanation, many thanks.
I’ll be sure to drop in again.
I am glad you enjoyed it.
I’m an abstract painter just researching pours for now. I’m trying to understand the mixing process using glue/water ratio to paint ratio. There’s just much info to weed through. Why use glue? Can you mix larger amounts in larger containers for use later or just for that pour? For instance I love a ribbon of pink or gold in most paintings for contrast but wouldn’t want to mix it each time of I can avoid it. Can you offer specifics for those of us just starting out? Thanks so much.
Glue is a inexpensive material acts just like a professional pouring medium. You can mix larger batches but when you add water, it will eventually spoil. Normally I only keep my pouring mediums after adding water for at max two weeks.
You should read my article on using glue as a pouring medium on the website or on my YouTube channel. Both will give you the information you need.
FYI, I just use most of the paint in my acrylic pour and then use the leftovers that haven’t been mixed with other colors and pour them directly on the painting in ribbons.
Are there negative effects to applying to much heat to the paint? I’m worried I might be over torching my paintings
Yes. You can burn the paint and you can cause the top layer to dry too fast causing cracks and crazes as the rest of the paint behinds to dry. Never leave the torch on a spot for more than a fraction of a second and never get the flame/heat super close to the surface of the paint.
Hi, when u say glue, what glue are u referring to please? Is it basic Elmer’s glue or something else, and how would I use glue as a.medium?
Elmer’s glue-all is what I normally use. I’ll be experimenting with other glues like clear glue, school glue, and other glue makers like Michael’s also.
Hi! I’m new to pouring. I’ve been using a base coat of white to help with the paint flow, but after my pours the white paint keeps popping through my colors. I do use a torch to remove bubbles. Any tips to stop this from happening?
Use a heavier brand of white. Craft paint, latex paint, and cheaper paints won’t have as much pigment and will be “lighter” then the paints you put on top. That means when the heavier paint lays on top of the lighter stuff it will rise to the top. Try using one of your colors as the base or a higher quality titanium white Leslie.
I have been using black, white and magnolia house paints for my base coats which work a treat and far more economical.
That is interesting. I always get unwanted effect especially on the outside of my painting with house paint.
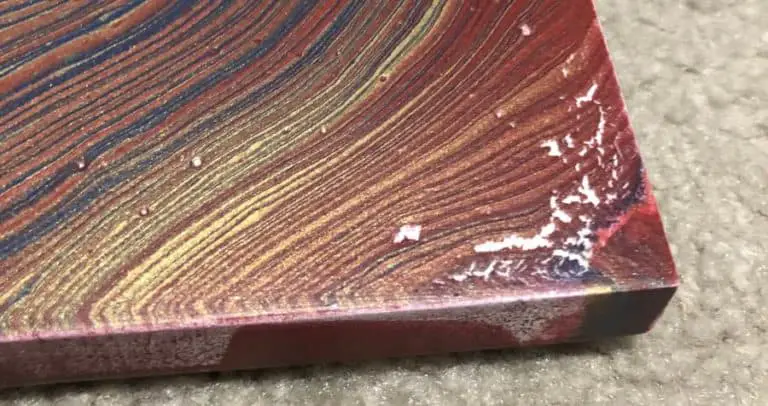
I did 2 pours last night and for the first time, after lightly torching, very miniscule white paint dots (pin prick size) can be seen splattered on the dark colors, barely visible if not scrutinizing. Doesn’t look bad… just surprised me. It’s as though the torching caused the white paint to splatter elsewhere for some reason. Any experience with this phenomena? I will add that the white pillow paint was not too thin and the torching was very quickly done.
Those are pinhole bubbles. This happens pretty much 100% of the time if you use a torch. Just microbubbles in the underlying paint coming up through the suface.
Thanks a lot for your time to publish all these very helpful tips and information especially for newcomers on this kind of art. I am a self made artist. I learn by doing, and of course researching for further information, since there are many different tips and tricks. So I guess each individual has to make its own experience and can decide what is best for itself. Since there are so many fine artists both beginners and professionals, I guess the competition is rather high. So at this point I just wish you all the best. Videomaking and doing the artistic so time consuming. For the moment I enjoy learning from you guys and apply it in gathering my own experience!
Don’t get tired in sharing your knowledge. More power to you! Thanks so much! Cheers.👍😊
Thank you so much. I am the same way. I can’t just listen, I have to do (usually quite a few times) to really get what I am trying to learn.
Thank you for your videos! You keep me from losing hope with my outcomes because I learn something new every time. The biggest problem I’m dealing with at the moment is, just as I begin using the blow dryer my paint seems to take on a thick, scalded milk appearance.(seeming to dry way too quickly) I literally have to lift it off the canvas, or start all over. I was sure the consistency was right, but it still keeps happening.
I would greatly appreciate any insight you have.
Margaret Swearingen
realtymarg@yahoo.com
That sounds like your paint is still too thick and you are using too high of a heat setting. You want to use low heat, low power, and cold if you have it on a large hair dryer. Small hair dryers you want high power but low heat/cold. I have a video about this on my YouTube channel called “Acrylic pour with HAIR DRYER Tip and Tricks” (sorry I don’t allow links in my comments because of spammers or I would just link it).
Thank you David. I’m about to start my first pour and I never knew why they used a heater. So much info that I never knew. I do paint with arcrylics but never tried a pour. Thanks for the tips! I’m sure I’ll be keeping up with your post
Let me know how it goes Cindy!
Hi David,
thanks to your videos, I started pouring and I am loving it!
What does seem to pop up, quite literally, are tiny bubbles. At first I thought they were little clumps, but ‘the internet’ said that they are air bubbles which can be popped with a small torch. So I did that, they seemed to pop, but when dried, I still have little bumps in my painting.
What am I doing wrong, and how can I prevent these bumps from appearing in my paintings?
Thank you so much in advance,
Kind regards, Wendy van Wijngaarden
Use higher quality paints, wait 24 hours after mixing your paing then only lightly mix before using, torch after pouring but before tilting. Those are the best places to reduce bubbles. You won’t ever get rid of all of them.