Can You Do an Acrylic Pour Painting on Paper?
Have you ever wanted to paint but didn’t have any canvases or hardboard at home? You may not always have time to go buy a canvas or maybe you just want something a little more low key and budget-friendly to experiment with.
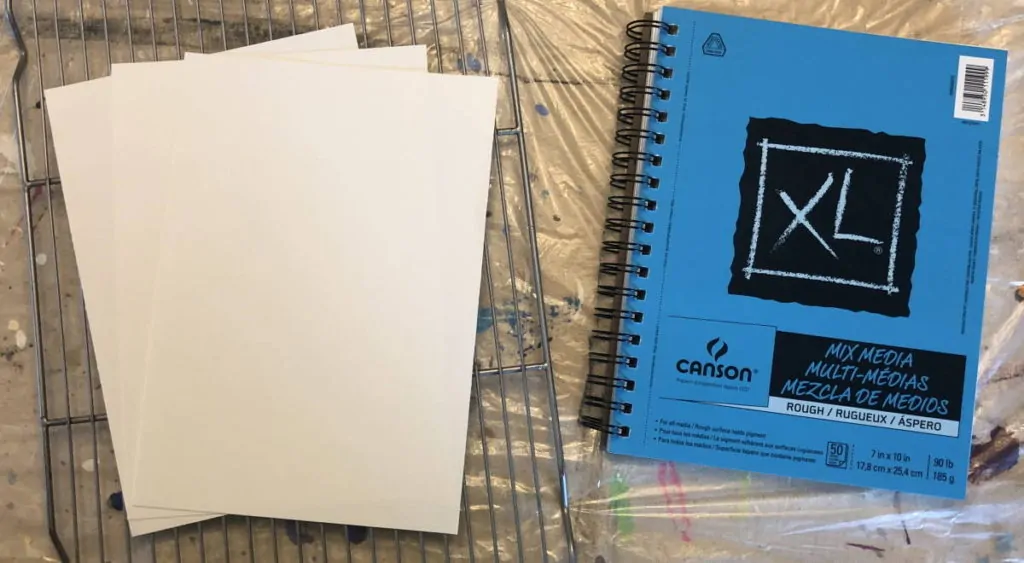
Can you do an acrylic pour painting on paper? There are many different types of paper that you can use for acrylic paint pouring. Watercolor, acrylic linen, canvas, Yupo, and photo papers are just a few of the types of paper that will work with fluid acrylic pours.
While certain types of paper can definitely be used for pouring, some do require additional considerations to get the most out of our painting experience.
Paper Types and How They Affect Your Painting
Just as there are a wide variety of surfaces beyond a simple canvas to paint on, there is also a wide variety of papers to choose from and each will affect your painting differently. Below is a condensed quite on some of the most popular papers used for acrylic pouring.
| Paper Type | How it Works for a Pour Painting |
|---|---|
| Watercolor Paper | Made to handle the moisture of fluid paint, but still very thin and flexible. Also may allow colors to bleed and mix more than on canvas, especially if the paint is very thin. |
| Acrylic Linen Paper | A sort of fabric paper. Sturdier than watercolor paper. Will also absorb more paint and allow colors to remain separated. |
| Canvas Paper | Most similar to canvas painting (for obvious reasons). Sturdy. Has the texture of canvas, but the thinness of the paper. |
| Yupo Paper | A synthetic paper with a smooth surface. The finish allows the paint to run and move more easily and also provides for a sturdier painting, but with a different texture than canvas. |
| Photo Paper | Similar to Yupo paper, but even more slick, which means even more movement when the paint is thick or when tilting. |
| Mixed Media Paper | Probably the cheapest of the options. Does tend to curl slightly when the paper initial starts to absorb moisture. |
**Some other less common options for paper-like painting surfaces are card stock, parchment paper, or contact paper. Each of these has some additional considerations that make them less than ideal for regular painting.
Cardstock is not protected against moisture like the above papers. Parchment paper is a great way to create paint pour skins for use in jewelry and other crafting applications. Contact paper requires some work to get it to lay flat while you pour but can be especially useful for decorating places like kitchen drawers and other flat surfaces.
It is important to remember too that like the difference between painting on a canvas versus smooth wood, the type of paper you use will affect how much paint you need for full coverage. Canvas paper, for example, will take more paint than a piece of photo paper with the same surface area as it has more texture for the paint to fill.
Please refer to our article here on how much paint is required for an acrylic pour.
Dry times are also affected by the surface on which you are painting. Since paper cannot absorb as much moisture as wood or canvas, you will generally see a slightly longer drying time with paper.
Adjusting Your Techniques to Paint on Paper
When using a paper-like Yupo or photo paper, the paper maintains its rigidity enough to allow some tilting and traditional methods of pour painting, though beware they will still flex and bend more than your canvas. But to do a pour painting on watercolor or linen paper, you may need to change up your painting style.
Securing your paper is one of the things that is the most different from pouring on canvas. Many artists choose to tack their paper down to another surface. This will allow you to paint without fear of the paper sliding around as you pour or tilt.
You can use painters tape to tape it to your surface, creating a small border around your painting (which you can trim off later if you desire), or you can stick it to the surface using double-sided tape or glue dots found in the scrapbooking aisle.
From here, paint pouring on paper works the same as on any other surface. Select the technique you want to use and paint away.
If you need some inspiration for your pour, you can refer to our blog post about ideas and inspiration. You can also review our list of the 5 basic and 16 advanced acrylic pouring techniques.
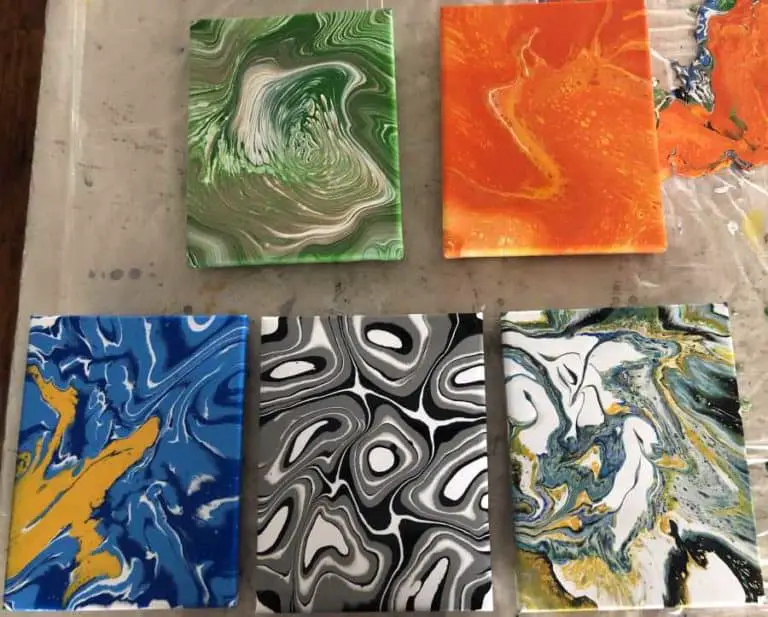
Advantages and Uses of Fluid Painting on Paper
While using paper may require a little bit of finagling to master, it has so many uses and advantages. We always have to time my painting by how much drying and storing space we have, and canvases take up a lot of both. With paper, we could paint every night and always have enough room to dry and store more paintings.
Painting on paper is also easier on the wallet. The paper is cheaper than canvas and requires less paint. If we want to try out some new colors or techniques we use paper to try them out a few times before moving to the final project on a more substantial surface.
Having your artwork on paper also allows for additional uses of your art that would be difficult with a canvas or hardboard. You can turn your pour painting on paper into a book cover, a journal entry, a background for a photo, whatever you can imagine. With paper, the possibilities are endless.
Overcoming the Challenges of Pour Painting On Paper
Pouring on paper requires a little more than just paint and printer paper. One of the main challenges of printing on paper is that it absorbs the moisture of the paint very quickly and can thus get very soggy, causing the paper to break apart, wrinkle, bubble, or warp.
This, in turn, makes it hard to tilt and spread the paint around. The acid found in plain printer paper can also cause it to yellow and brown over time. We do not recommend using printer paper for any painting you want to last more than a few years.
And though you may not always be able to tilt your paintings, you can always use other techniques and tools that allow your paper to remain flat on the table while you pour your masterpiece.
Another option is to put your paper on a drying rack. This allows you to tilt with the rack and not have to deal with the pliable paper surface directly.
Once you have completed your tilting with a drying rack, we recommend lifting corner and running your finger along all the edges to remove the excess paint. This keeps the paint from gluing your paper to the rack when it dries.
Bonus Tip: Try gesso-ing your paper as you would a painting, albeit with much less gesso. We have yet to try this, but we have seen other artists use it, particularly to allow them to paint in journals, and it seems to work fairly well.
How much paint to use for an acrylic pour on paper?
Painting on paper requires less paint than a canvas of the same size because there is less surface area (no sides). It can also be affected by the type of paper and its absorbency.
With harder painting surfaces you don’t have quite as many issues with the paint being a little thicker than normal. Be sure to tilt off the majority of the painting and to keep the paint as uniform as possible across the paper surface so that it dries evenly.
If sections drying faster than others it will cause bending and warping.
Can you torch a fluid pour on paper?
Because paper is highly flammable, we would not recommend torching paper paintings like you would on a regular canvas. Flames can be used at a distance and only on areas where the paint is 100% covering the paper. Otherwise, you risk setting your paper on fire.
A heat tool or a very low-intensity blow dryer is a better alternative for acrylic pours on paper. Use the low fan setting if you don’t want your paint to get pushed around too much.
Practice on Paper
We think practicing your acrylic paint pours on paper is one of the best things an artist can do to learn and master new techniques. Being able to replicate a technique a dozen times on a relatively cheap painting surface when compared to canvas is invaluable both practically and financially for an artist.
Our last word of advice to those using paper as their painting surface is to save your paintings. Write notes on the back with any lessons you learned, the paints used, or any oddities that may have happened during your paint session.
These notes will help you to remember the lessons that you have learned and will allow you to refer back to them at a later date when/if you ever want to review your previous work.
Also, because paper is so much smaller than other painting substrates, you should be able to collect 50 – 100 or more paintings and have them all fit into a 2-4” school binder.


Thanks, David, for your website and YouTube channel. Yours are my go-to sites as I learn about acrylic pour panting. I am going to start using up some of my watercolor paper and I will probably tape it to another surface. My question is : when do I take the tape off? Should I try and take it off when I’m done or when it mostly dry? TIA for your help!
I usually wait for a few hours after I pour. That way the paint isn’t so dry that it rips off sections of my painting but it isn’t so wet that it runs out of my tape line.
If you do wait too long, just go over lightly with a exacto knife and a ruler so it is straight. You just score the paint and you don’t cut all the way through.
You can also heat the tape slightly with a hair dryer. This softens the glue and the tape lifts much easier.
Yes. I learned this one the hard way. Thanks Tricia.
How do you dry the paper? If I put it on a rack the edges tilt down and the middle conforms to the rack. How do you keep it flat when drying. I am trying to use paper to make cards? Been using heavy watercolor paper, perhaps another type would work better? Thanks, your information is so helpful.
You can pre-paint the paper before you use it to keep if from bending as much. With paper, especially paper that is not super heavy it will always bow some. Taping it to a surface before hand helps it keep it’s shape a little better too. I usually wait till it is super dry and press it between two books overnight (between sheets of non-stick paper) to flatten it a bit more.
I am a watercolourist and I love the acrylic pours. I was thinking about taping watercolour paper to a board like I do when I paint a watercolour. I think it maybe easy to gesso the paper if I do.
I look forward to your thoughts.
From Oz
I have definitely seen that happen. The paper still buckles a little but not nearly as much as a free sheet would.
Thank you so much. You have been so helpful. I do all other kinds of art. Have never liked abstract paintings until I saw some of my daughter’s friend’s Acrylic pour paintings. I just loved them. Haven’t been doing any painting in several years but this has me wanting to paint again.I got to hunting around and found I had everything I needed except three things, Flood Floetrol, silicone, and a turn style if I want to spin the painting. I have every color of GOLDEN OPEN slow-drying acrylics in 5fl oz. tubes that they had when I bought them. Can they be used in the acrylic pour painting?
They sure can be. You want to mix them with just a little bit at a time with the medium (floetrol). If you do too much floetrol too early it never fully integrates.
I am disabled. I cannot write anymore. I ceramic pour painted tiles for coasters. Loved it. I could do it! They were Christmas presies, went in the oven when dry, then hubby kindly varnished them for me.
But, now looking at making cards with Acrylic Pour Paint. Tried and having some difficulties. I need some help here, on how best to do it. I have never used floetrol to form cells, I just use the paints. I have never torched and would rather not do that with my disability.
So what is the simplest, easiest way for me to make cards? Is it to buy cards and then buy cardboard that will fit on the front of the cards and use that as the pour painting part and glue it on to the front of the cards? I don’t know. Anyideas would be most helpful. Thank you. I am feeling frustrated as the ceramic pour painting was so easy and fun and finding card making much more challenging for me. I need simple advise, not to complex or I will confuse myself. Thanks
Get really heavy duty cards. Tape them with painters tap (so it seals but doesn’t stick) on the outside edges so the interior of the card doesn’t get paint in it. Pour on them on a drying rack that you put cookies out of the oven on. Put that on a silicone matt or a table with plastic on it. Pour right on the cards. The smaller and thicker the card the less warping you’ll get.
You could also tape them down to a piece of cardboard and pour on that. Either way they will warp a little but that is ok. Just adds to the organic look of the pour.
Hi Belinda! I am also working on this. So far, I pour on a small piece of heavy art paper (mixed media, or acrylic, or watercolor), let it dry on a baking rack, and then trim it to fit onto the front of a blank card. I don’t usually get much warping since it’s a small piece of paper. I do use Floetrol and water to thin the acrylics. For pasting the art to the cards, I use permanent double sided tape around the edges, and it works well. Hope that helps!
Awesome. Thanks Michelle.
David,
I am so happy that I found your website. So far you are the only person that explains the why and how. I appreciate that you “teach” us. I understand that an artist put a lot of time, effort and money in learning all this techniques that you are giving us for free.
Thank you.
So glad these blog posts are helpful Karina. let me know if there are any questions you don’t find an answer to. I am always looking for new video/blog ideas.